Meetings are great and productive, but what about those occasions when you want to send off something that has a longer shelf life, and is available on-demand for your audience to view anytime? Whether you’re presenting a financial report, providing training, reviewing marketing metrics, or giving a sales pitch, using the Presenter Studio feature allows you to easily record projects and presentations for your audience to view on their own time by simply clicking a button and start recording. Here’s how:
Note: The Presenter Studio feature can only be used in Presentation formats. They are not compatible with other format types, such as an infographic or Social Graphic.
Presenter Studio
1
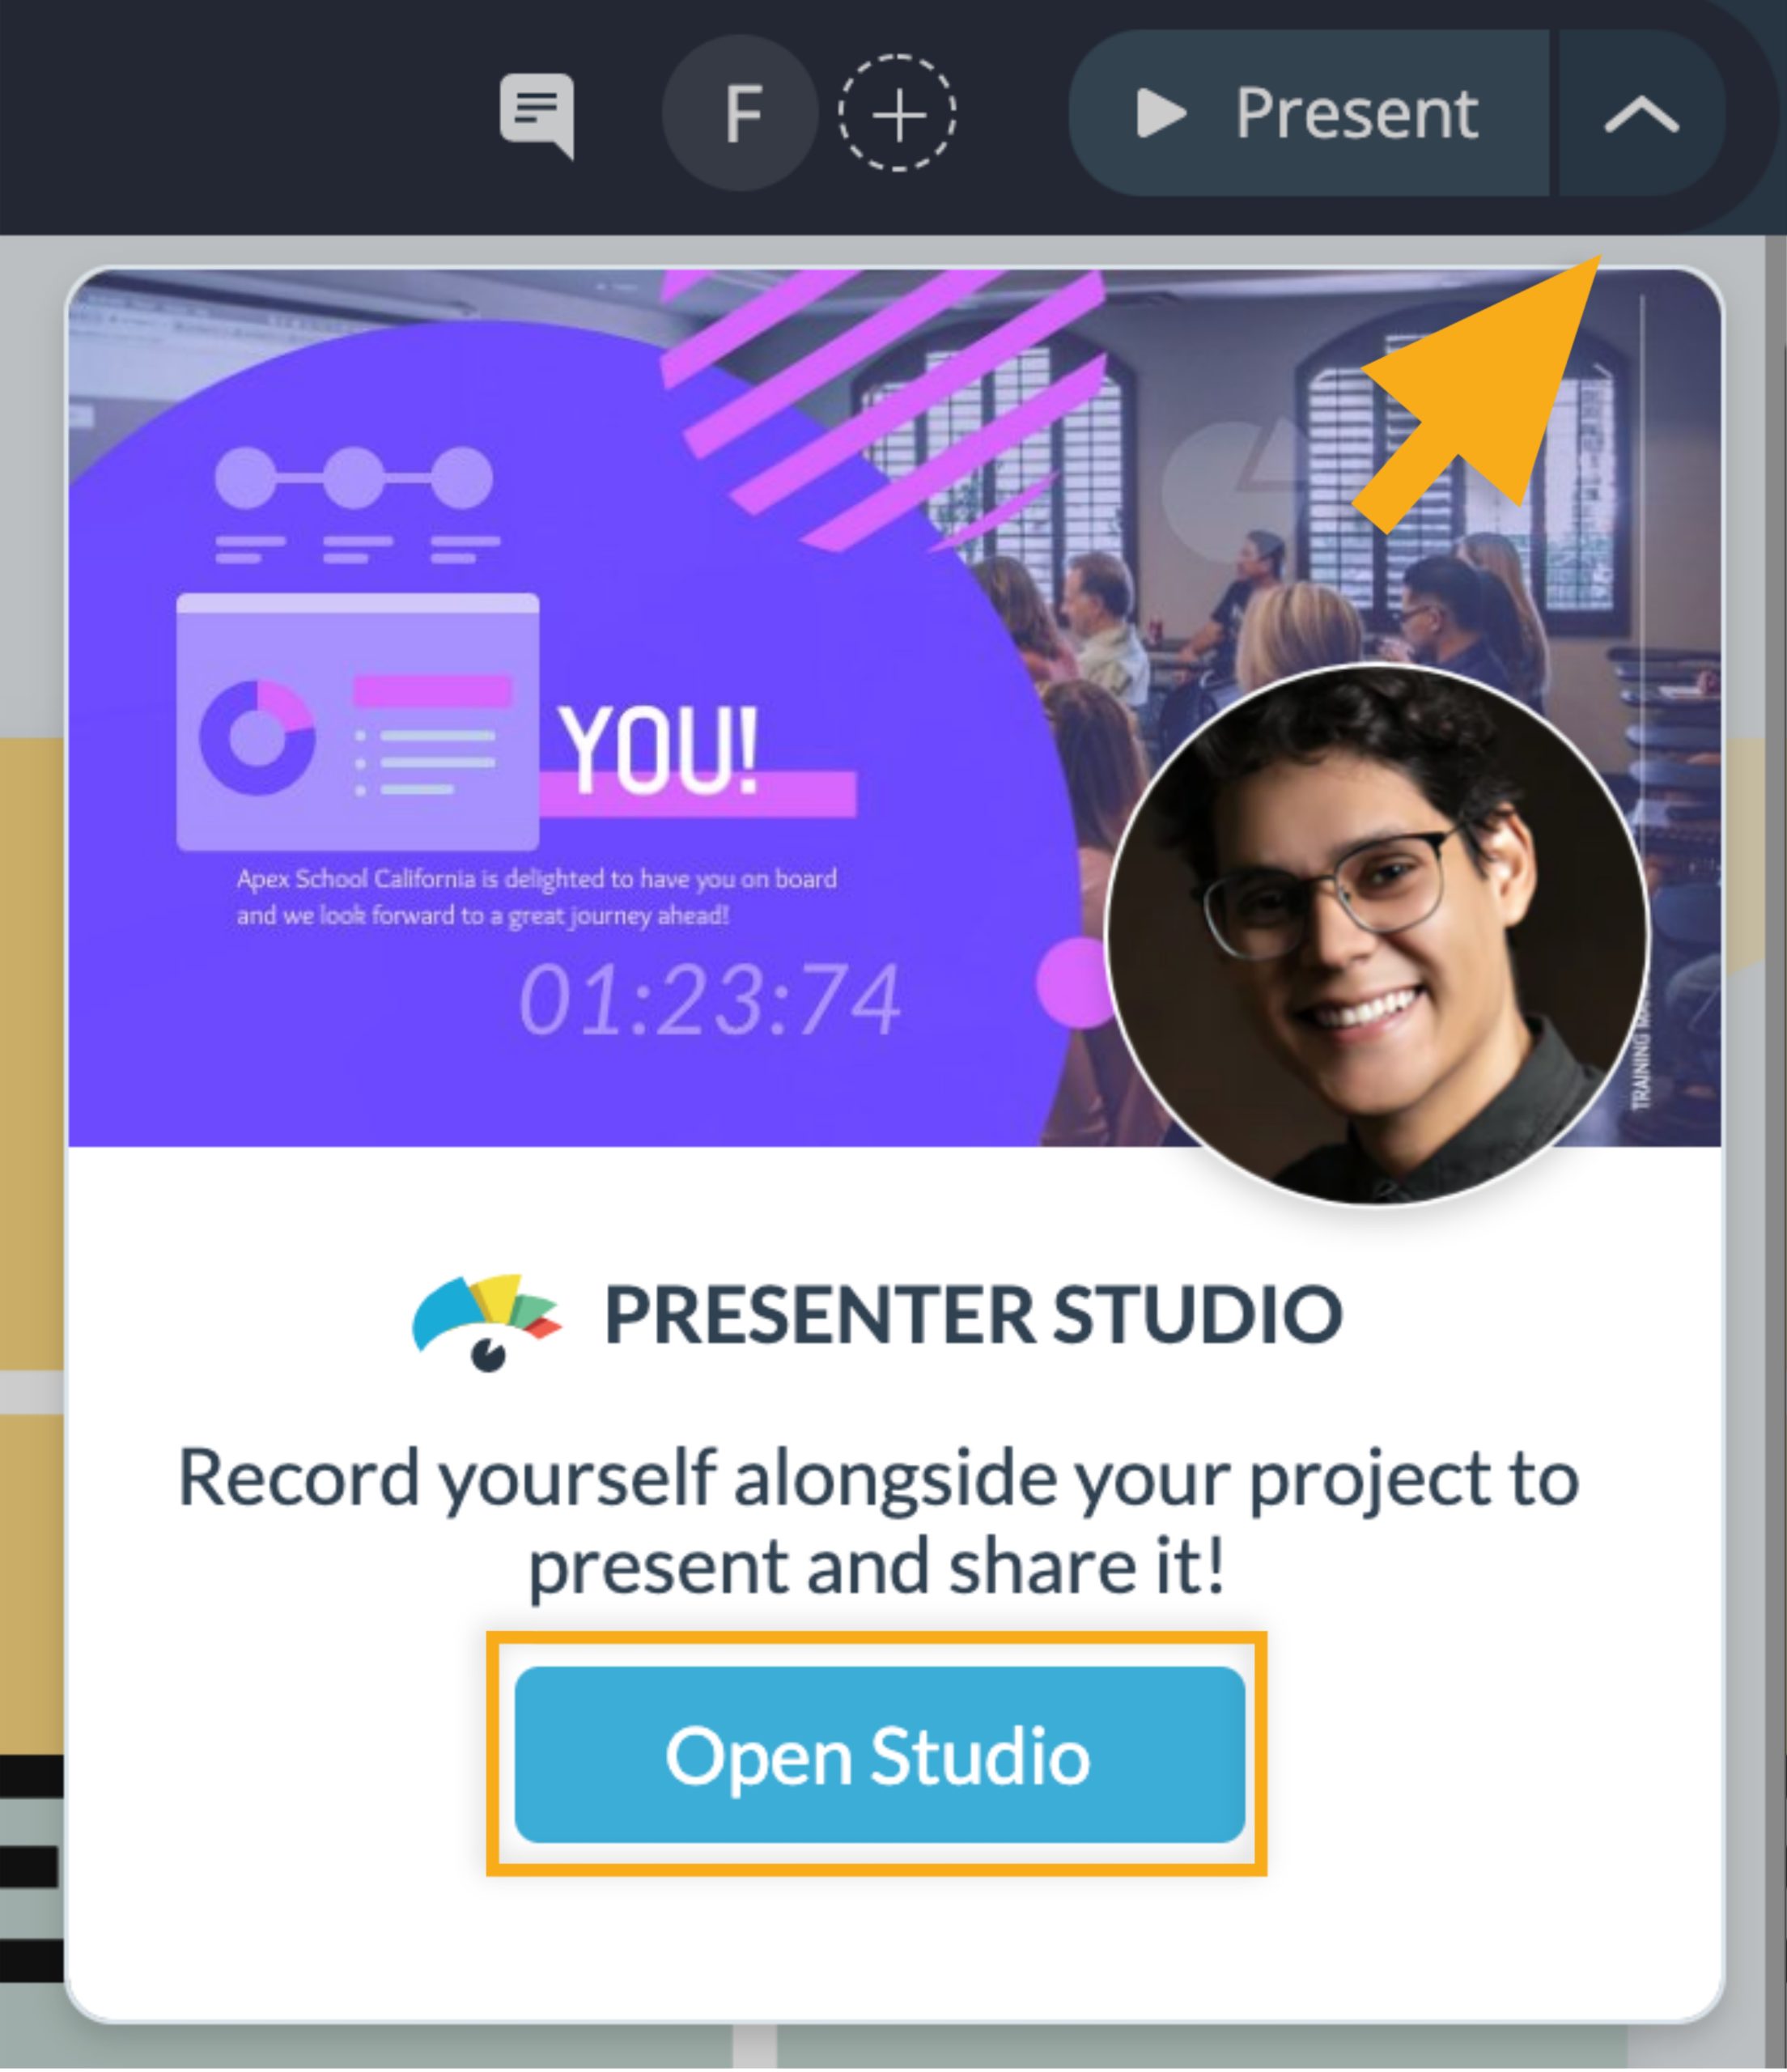
Once in the Visme editor of your presentation, click on the arrow button located next to the “Present” button at the top right corner of the screen. Then, click on the “Open Studio” button to move forward.
2
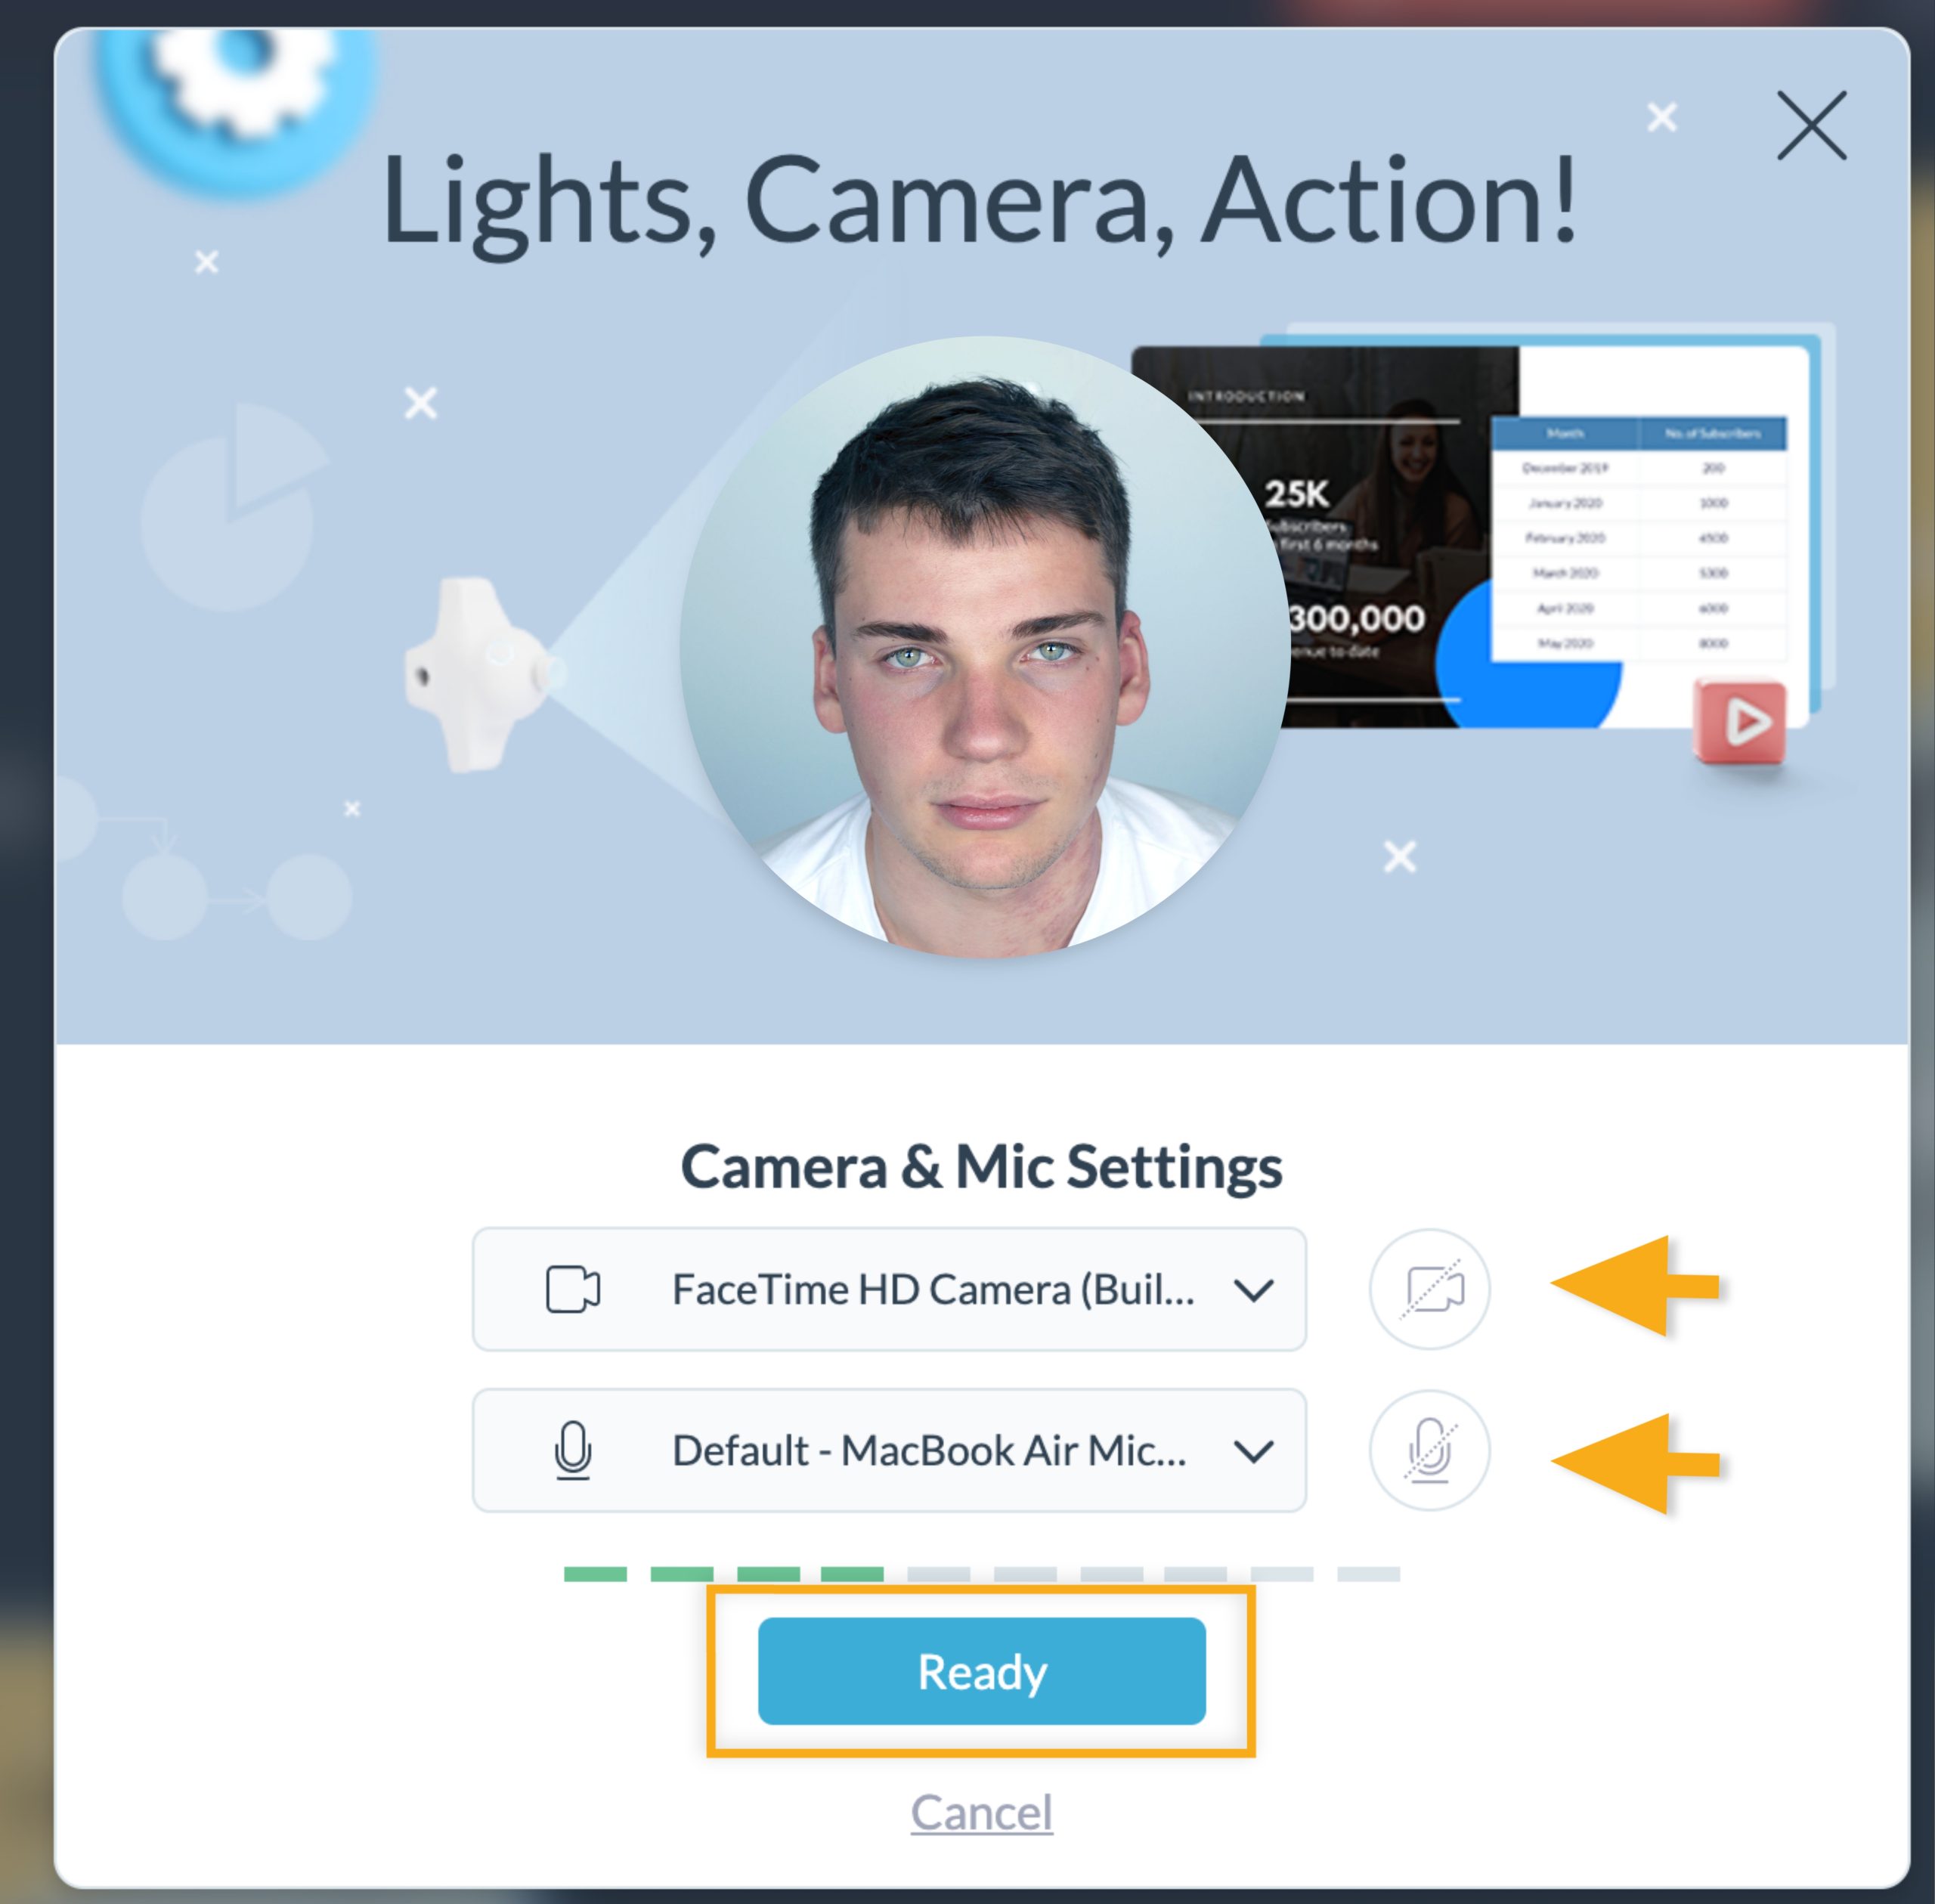
A pop up box will appear allowing you to set up your camera and microphone. Once that is done, click on the “Ready” button to access the Presenter Studio.
3
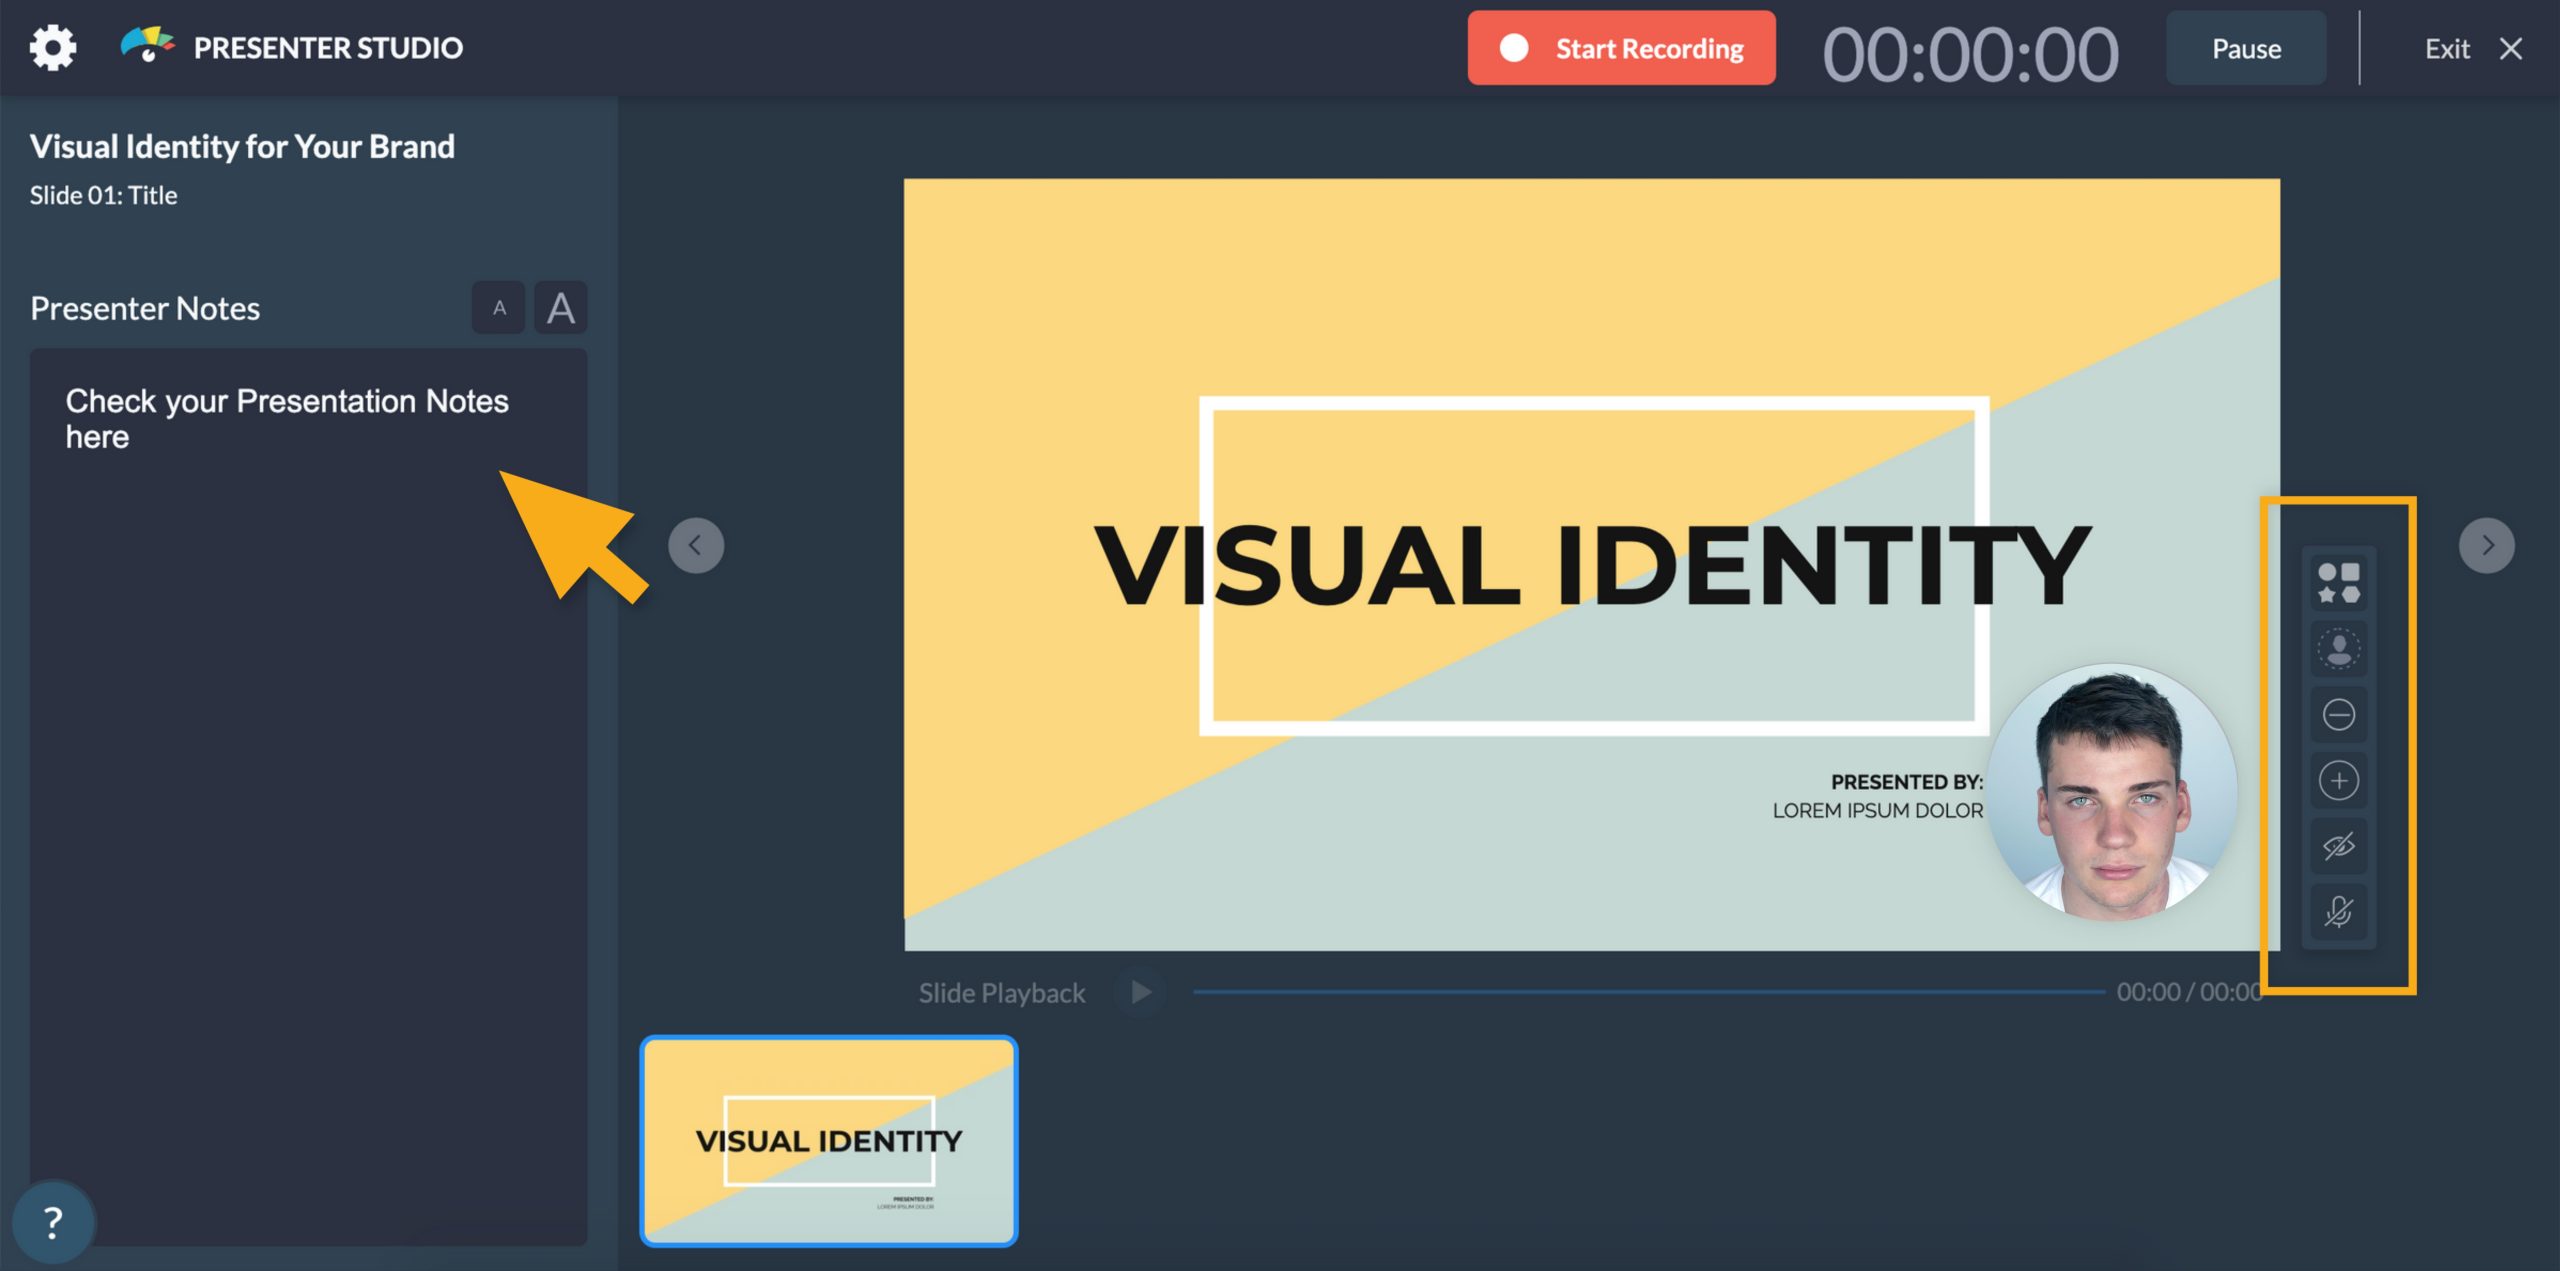
Once in the Presenter Studio, at the left of your screen you will find the Presentation Notes to manage your speech when given a presentation. At the right of the screen, you will see a menu with many different ways to customize the image that comes out of your camera such as shapes, style and size. You can also mute or unmute your microphone from there.
Note: For more information about Presentation Notes, check out this resource.
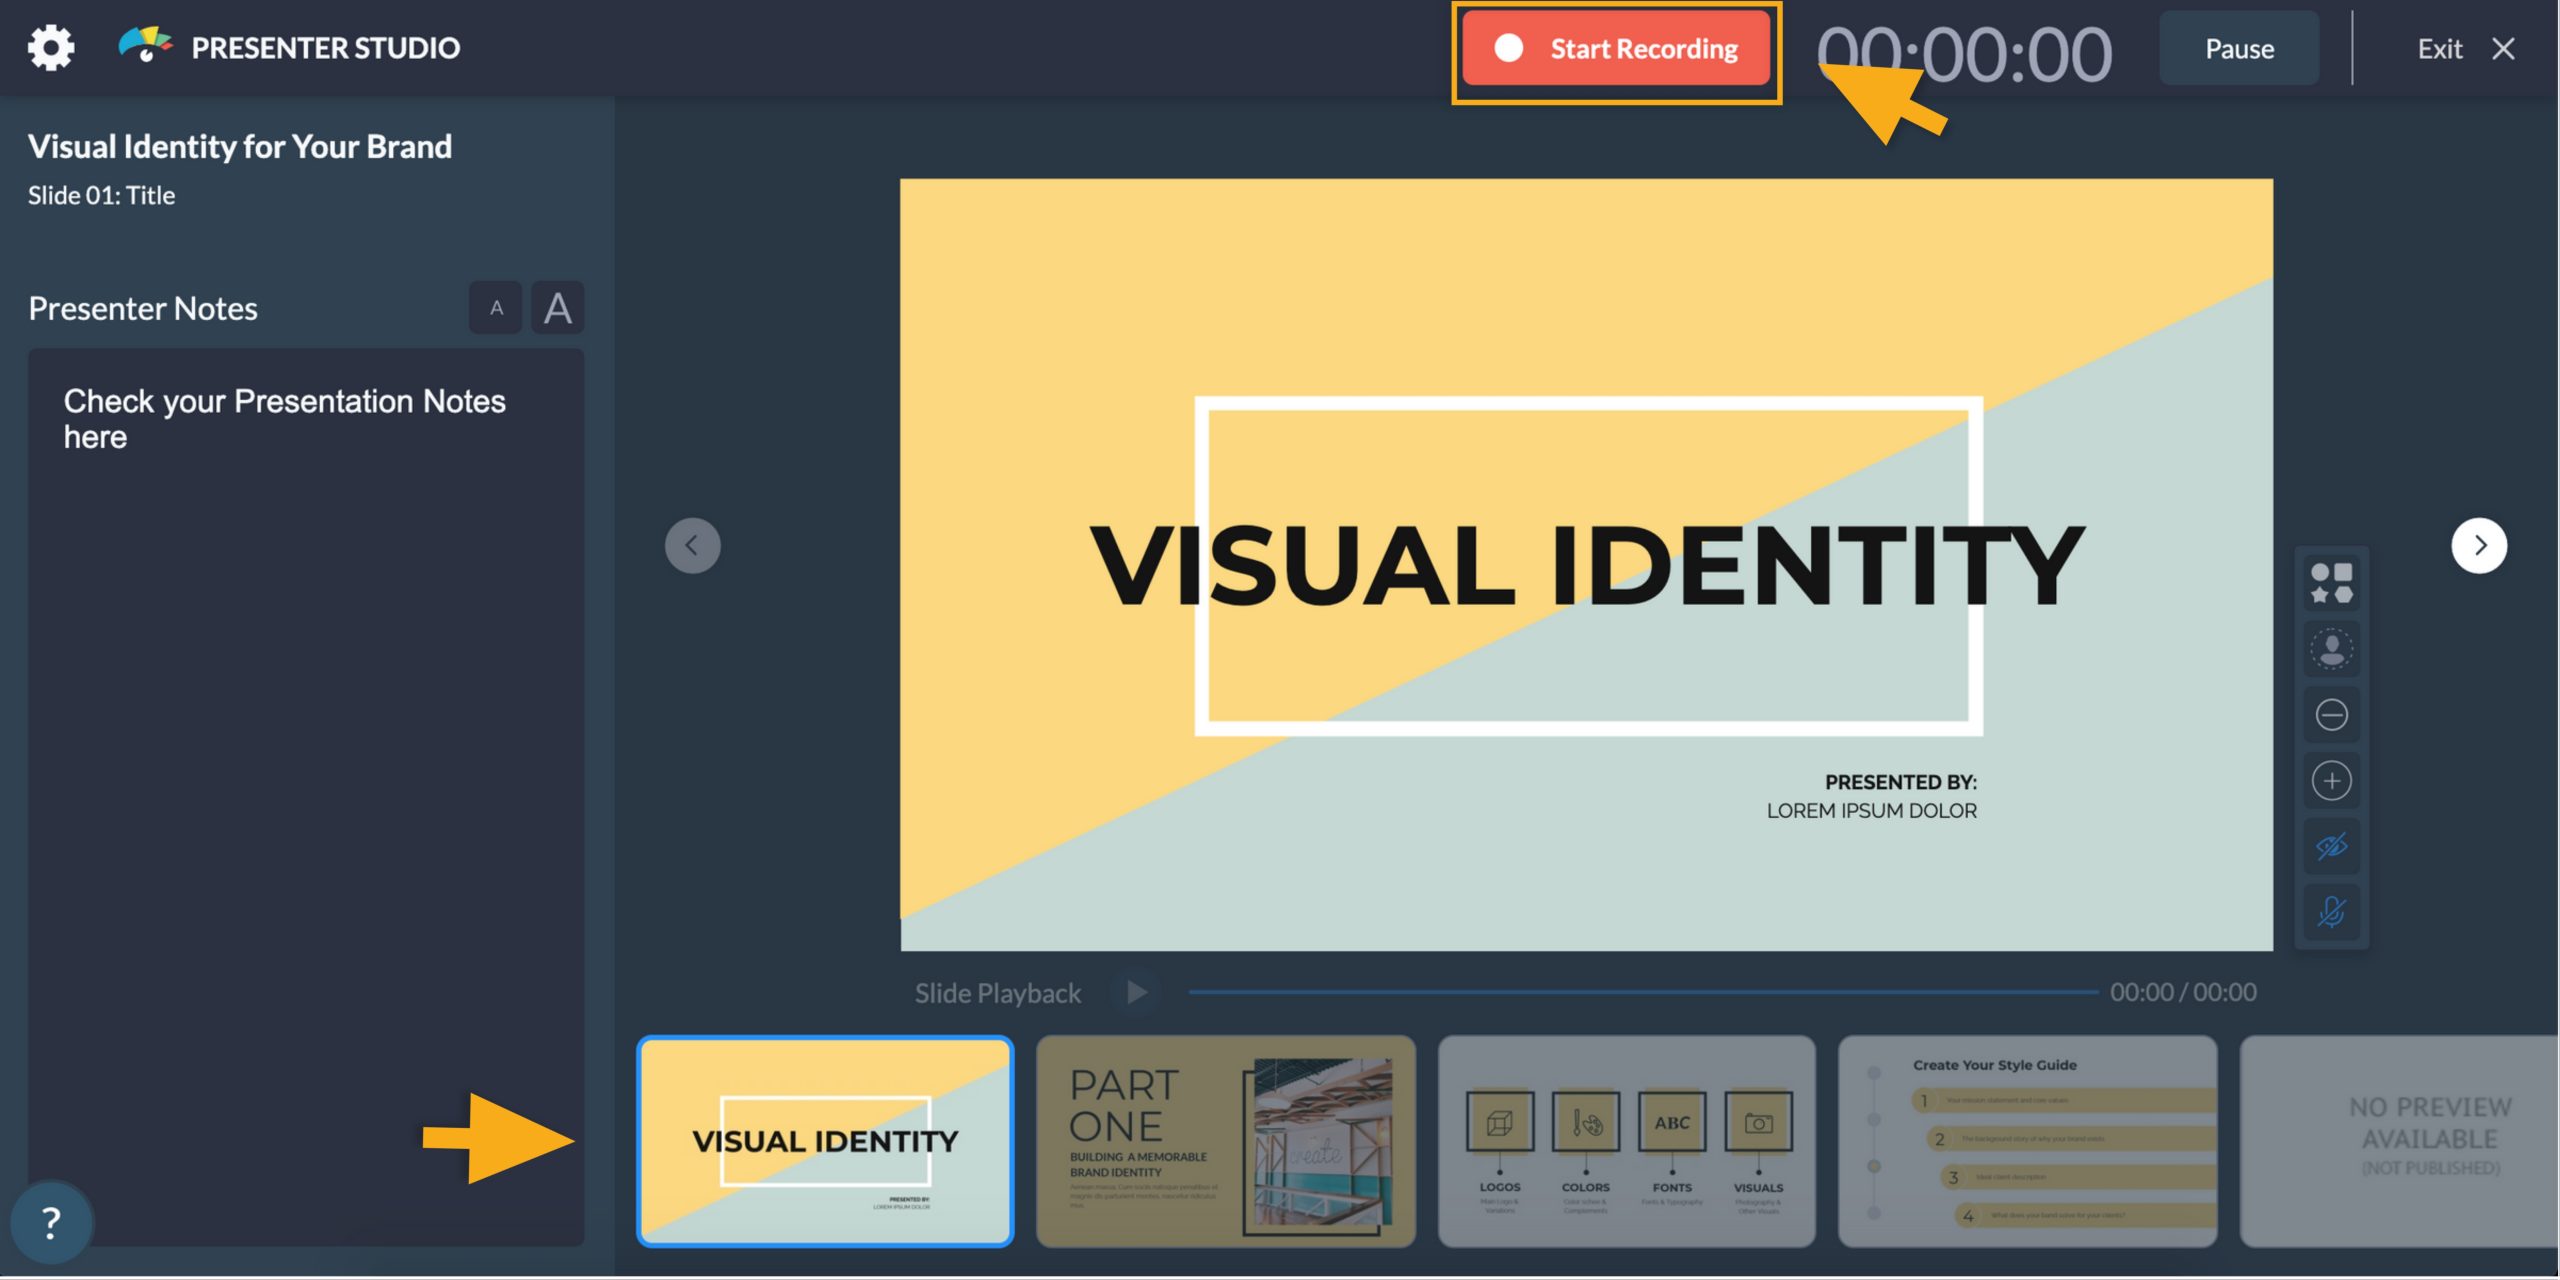
4
The time of recording your presentation has come! For that, you just have to click on the
“Start Recording” button at the top of the screen and start presenting your project. To manage your slides, select the slide you want to present from the thumbnail view of your slides by simply clicking on it. You can also manage it using the keyboard arrows.
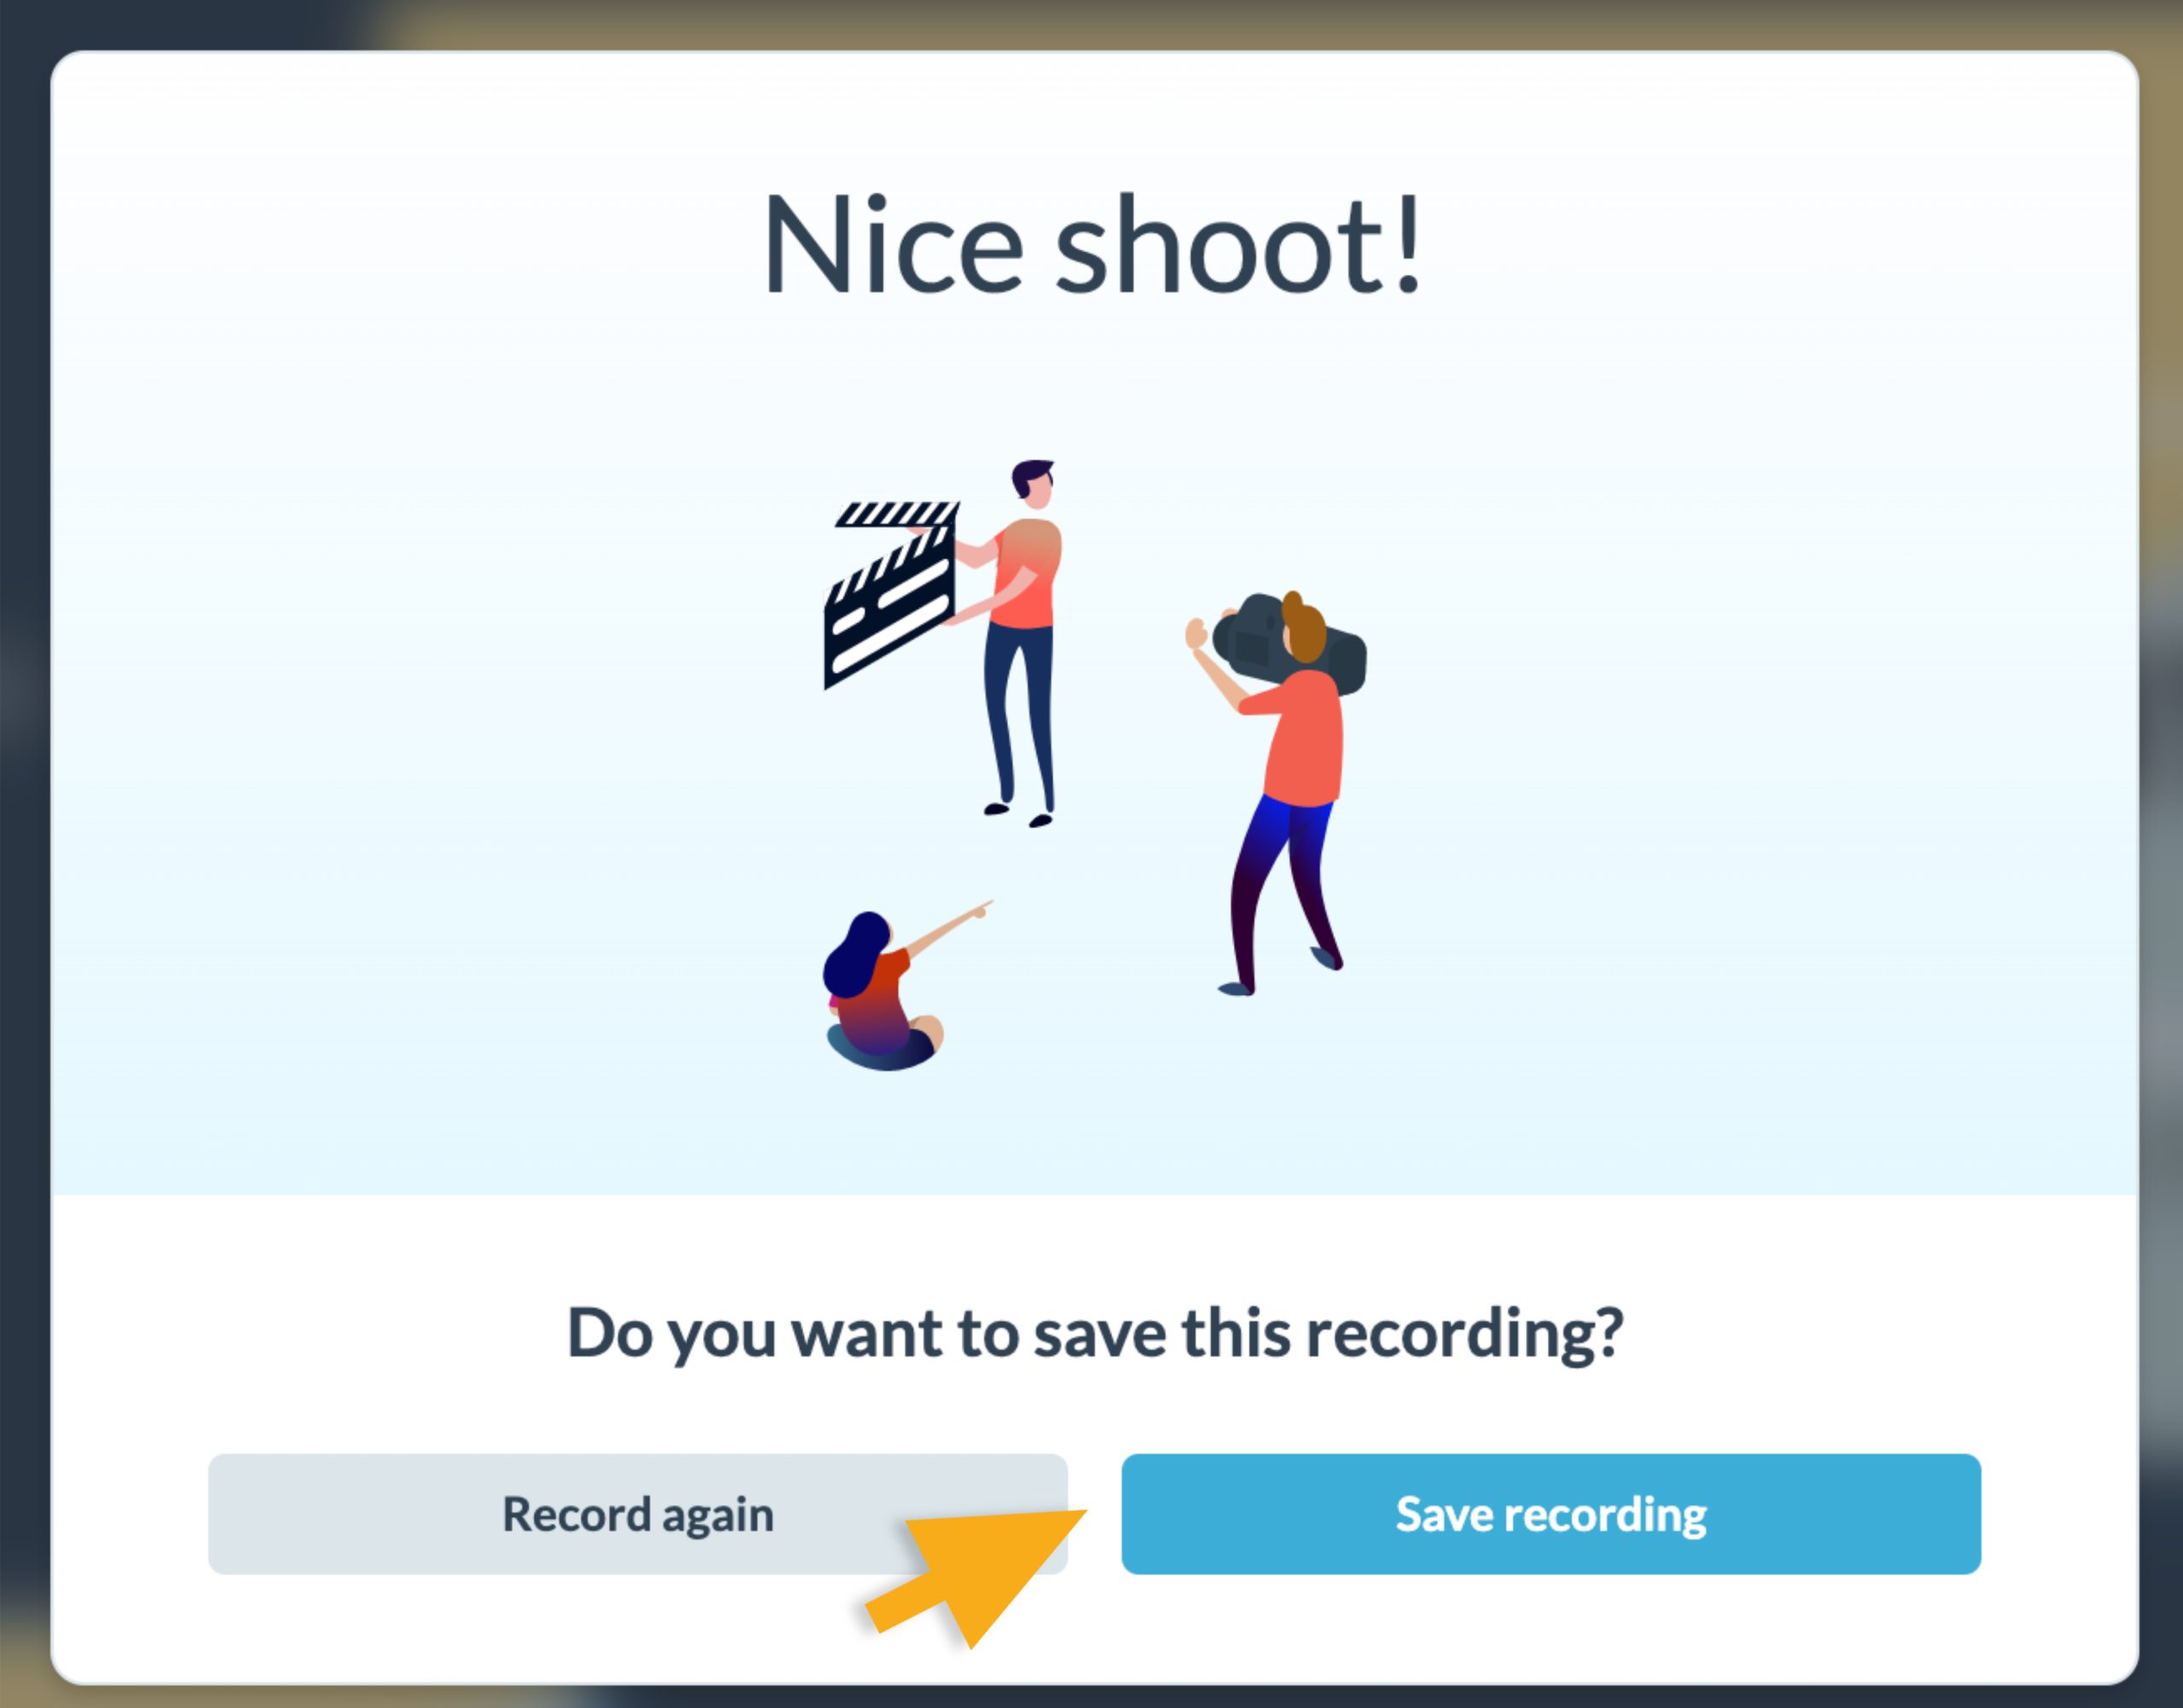
5
Once you finish your presentation, click on the
“Stop Recording” button located on the top of your screen. If you just want to pause the recording and continue recording later, click on the
“Pause” button.

6
A pop up box will appear allowing you to record your presentation again or to save the recording. Click on the
“Save Recording” button to move forward.
7
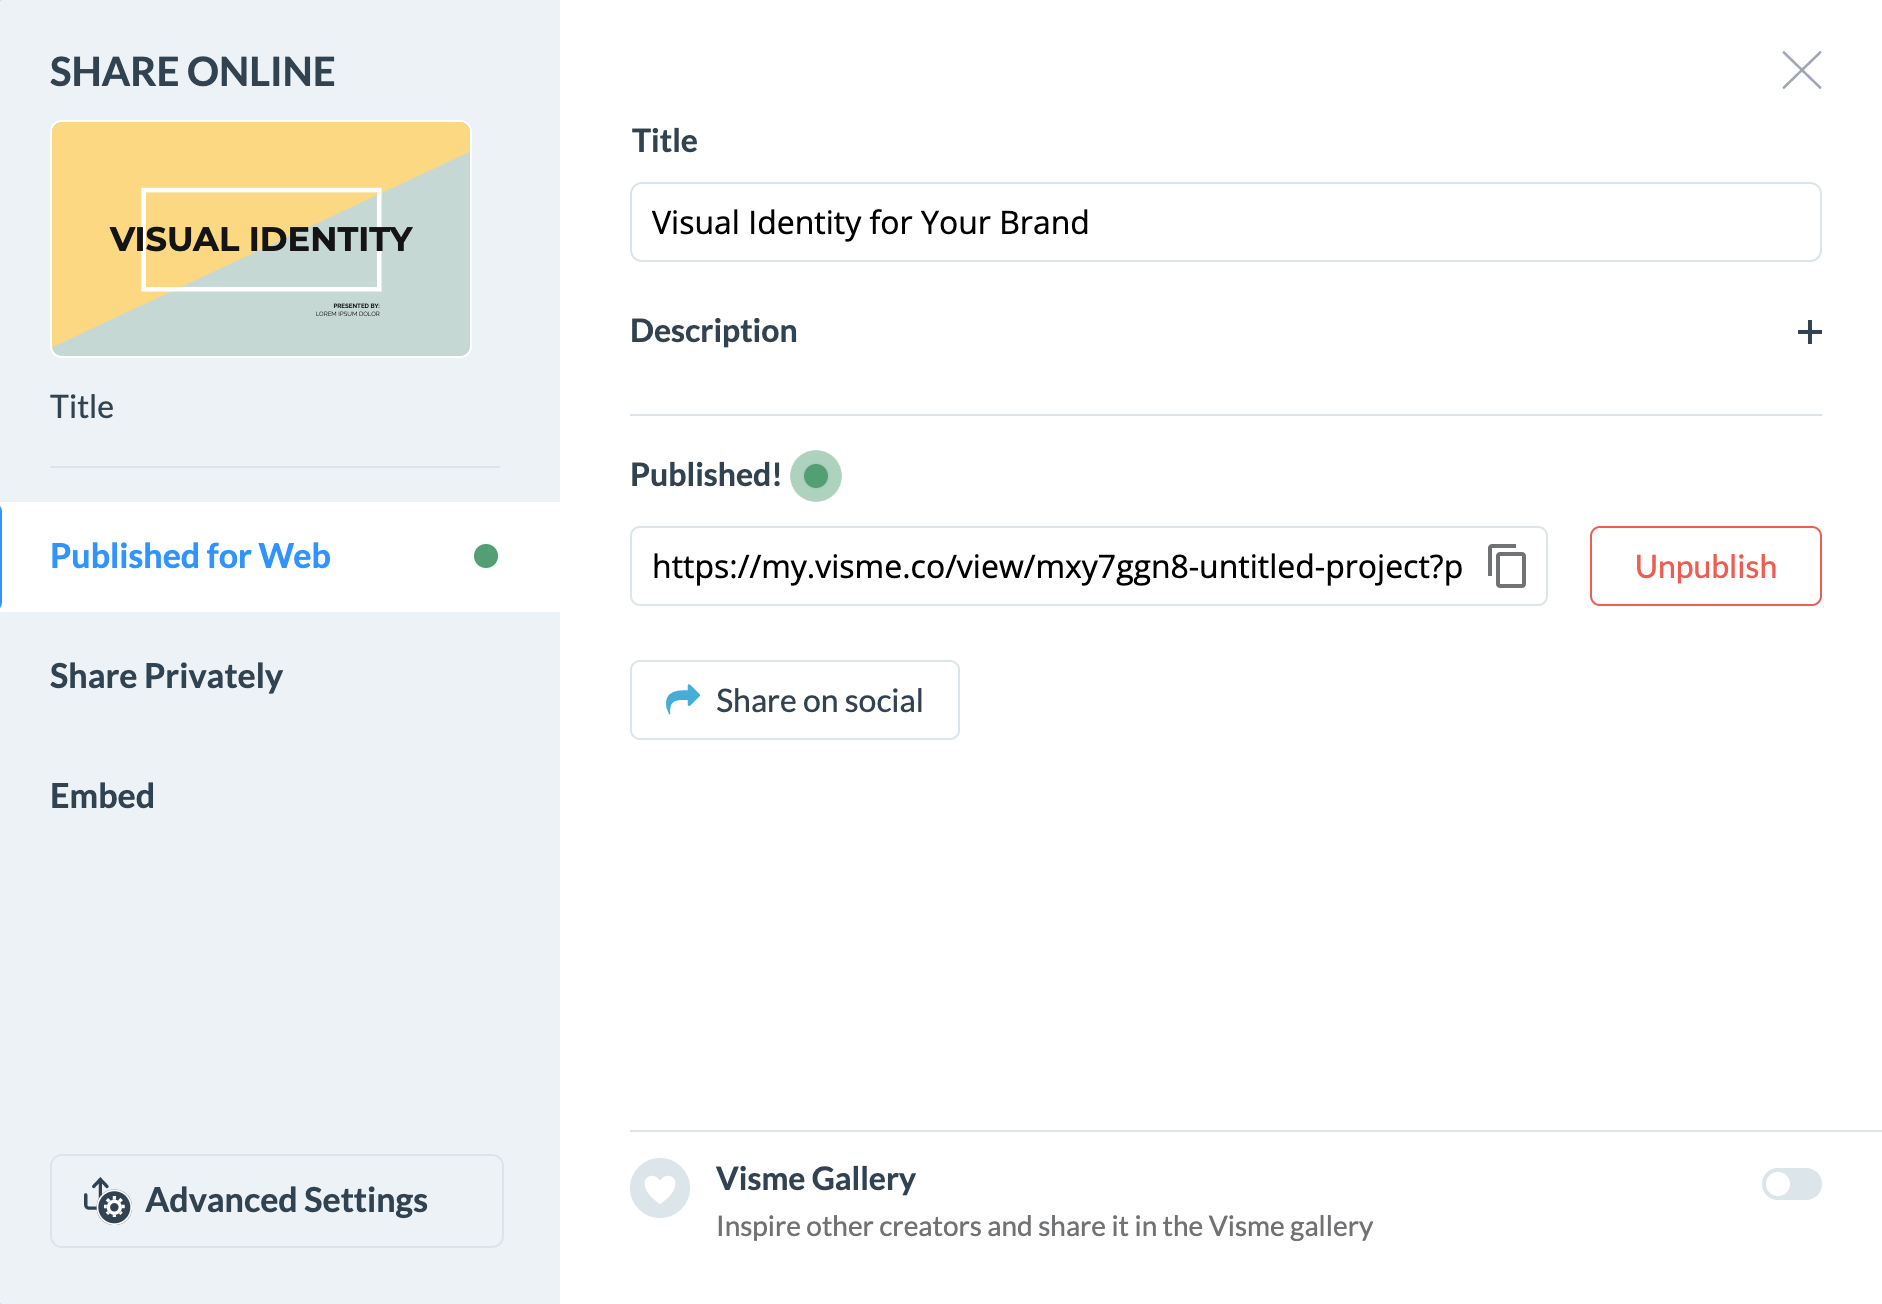
Your recording is ready! If you want to see the final result of your recording, click on the “Present” button. To share the recording with someone else, copy the generated link located on the text box by clicking on it or click on the “Settings Icon” to more sharing options such as share on Social Media, Share Privately or generate an Embed Code.
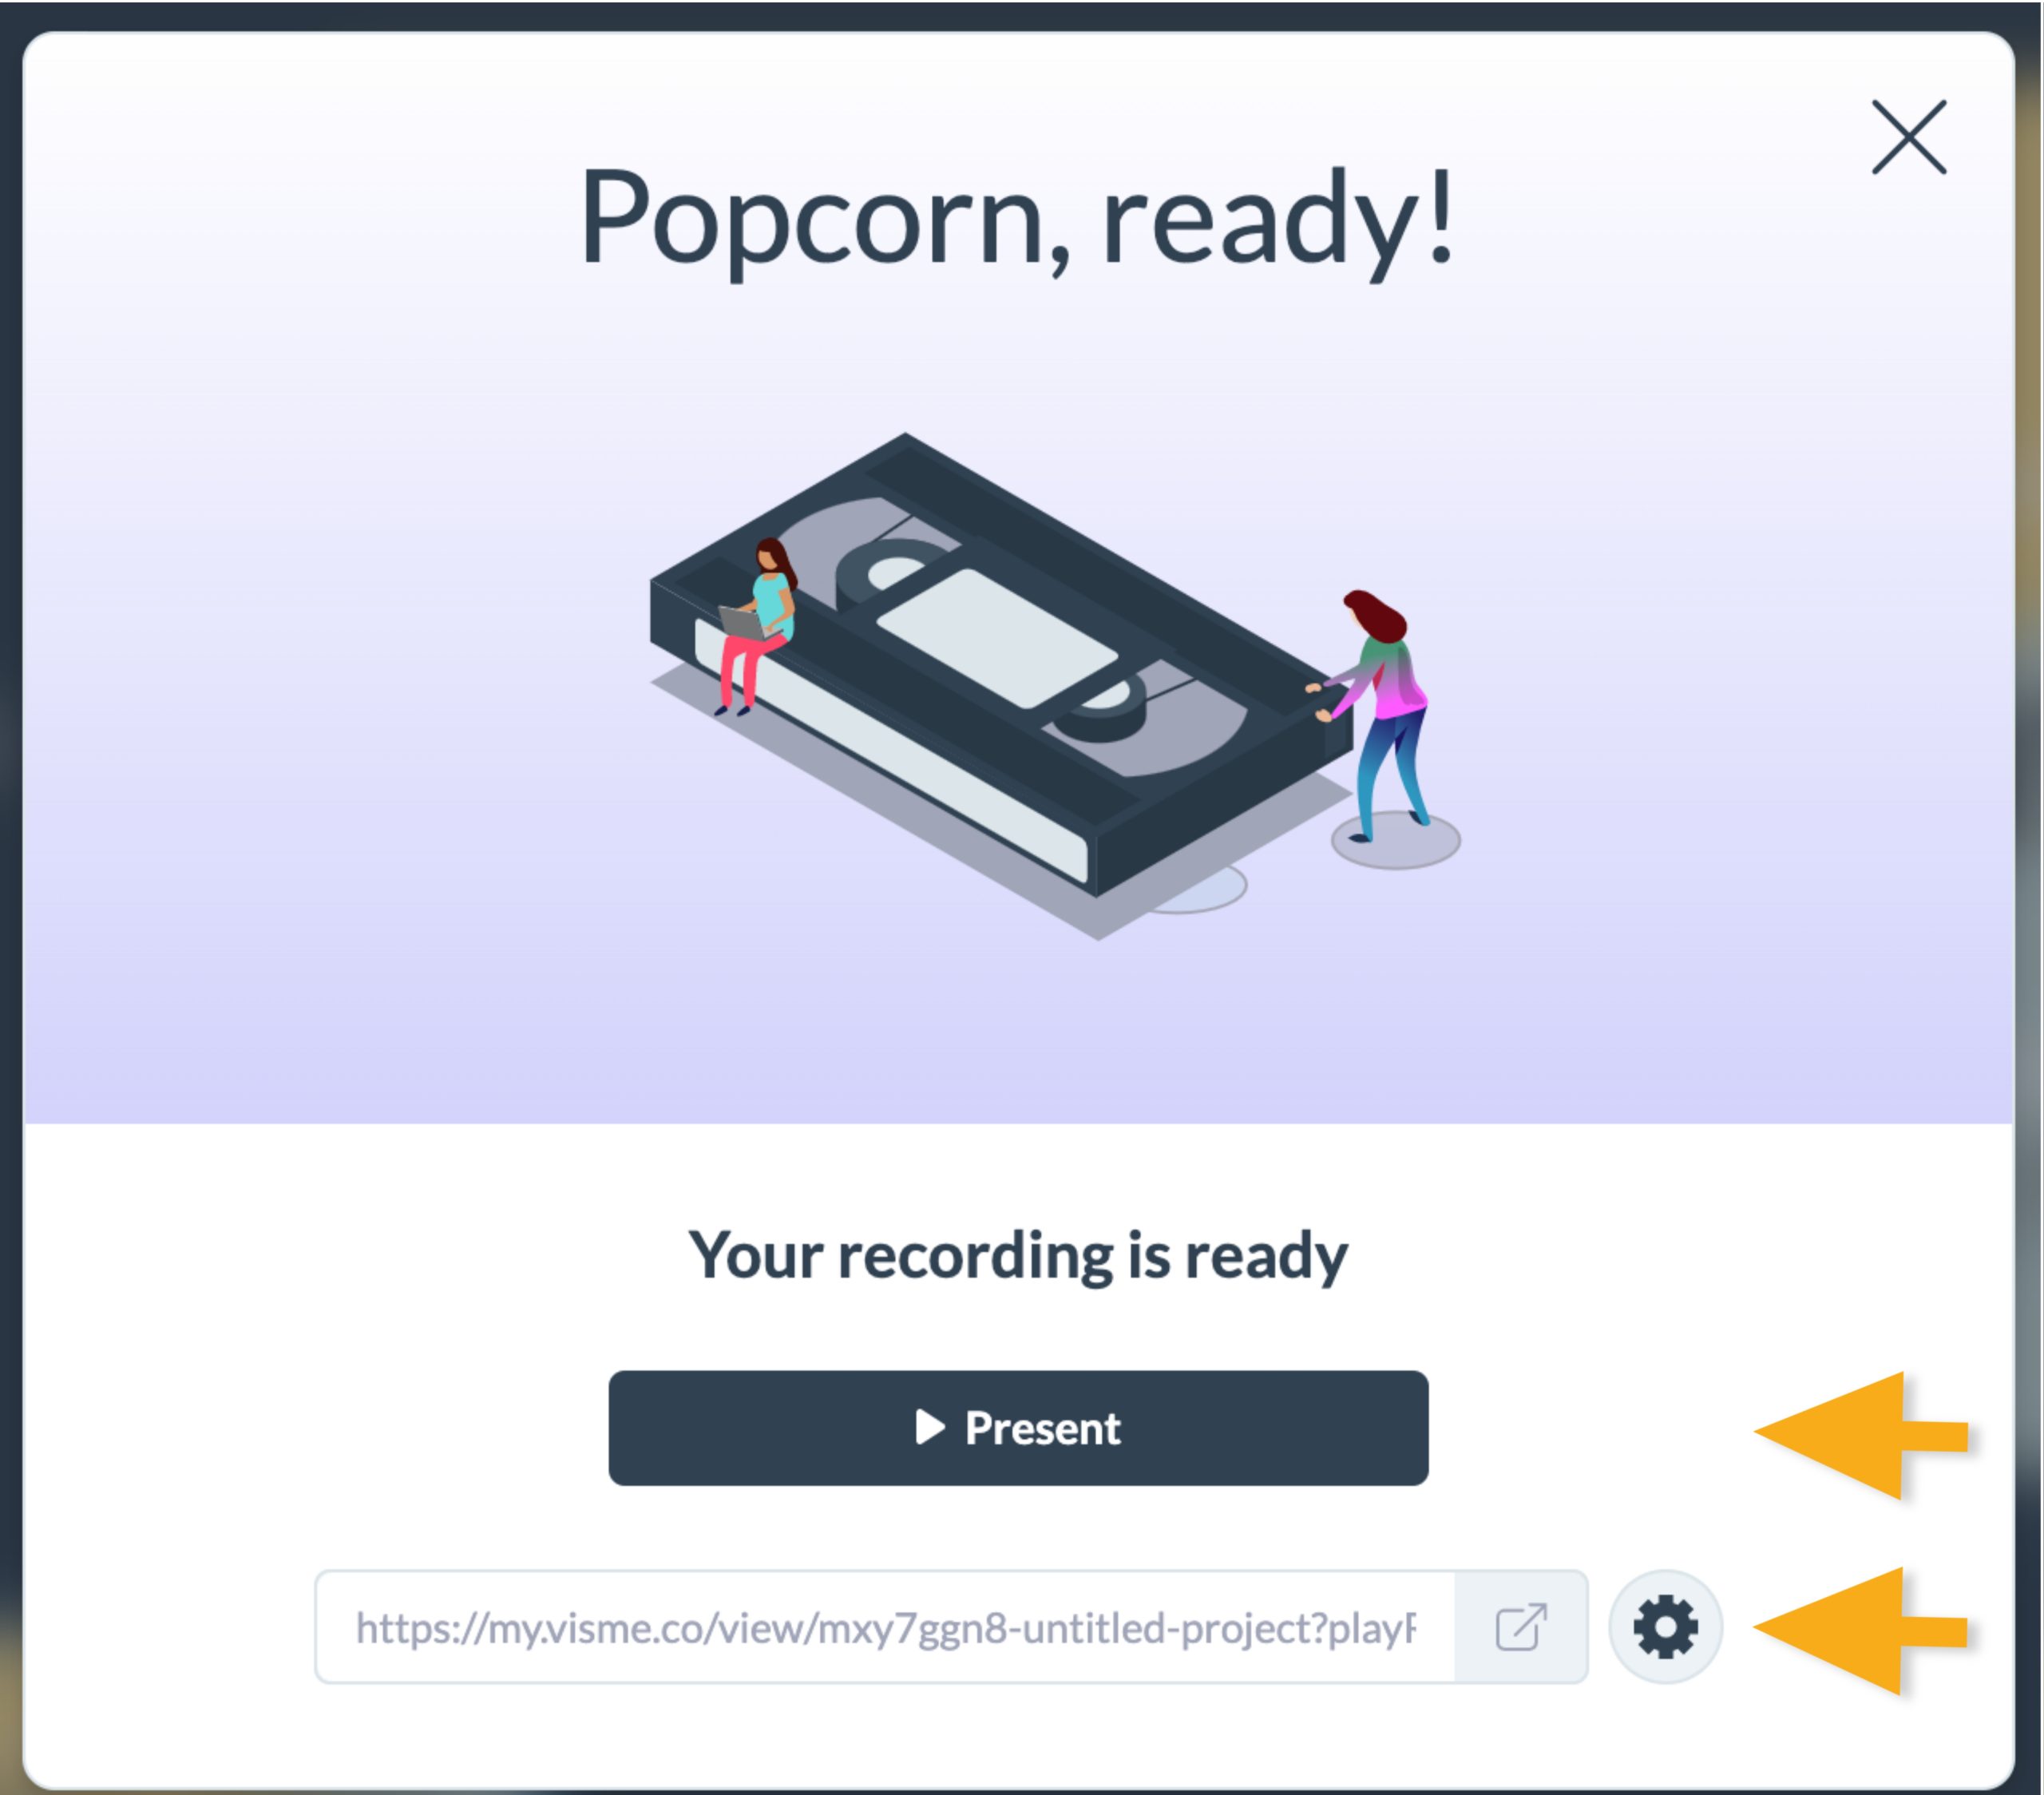
Note: On the final video of your recorded presentation, the slides view and the presenter notes will not be visible.
Presenter Studio Time Limit
Free Plan: Up to 3 minutes
Personal Plan: 45 minutes max
Business Plan:45 minutes max
Enterprise Plan: 45 minutes max
Note: You can track the traffic and gauge the effectiveness of the projects recorded using the Presenter Studio feature. Learn more
here.