Learn how Visme will change the way you create stunning content.
Reserve your seatVisme’s Animation Timeline allows you to precisely customize the animations of your project regarding slide transitions, animation durations, audio and narration, and the order of animated objects. Visme’s Basic and Starter plans offer access to the Basic timeline, while Visme’s Pro and Enterprise plans provide Advanced timeline editing.
The audio features below are available for both Basic and Advanced timelines within Visme.
Here’s how to explore the audio options in the timeline:
1
Click on the “Menu” icon next to the microphone icon on the Animation Timeline. From there, you will be able to record your audio, upload an audio file or add audio from the library.

Note: Learn more on how to upload audio files and how to use the audio library.
Upload Audio File
1
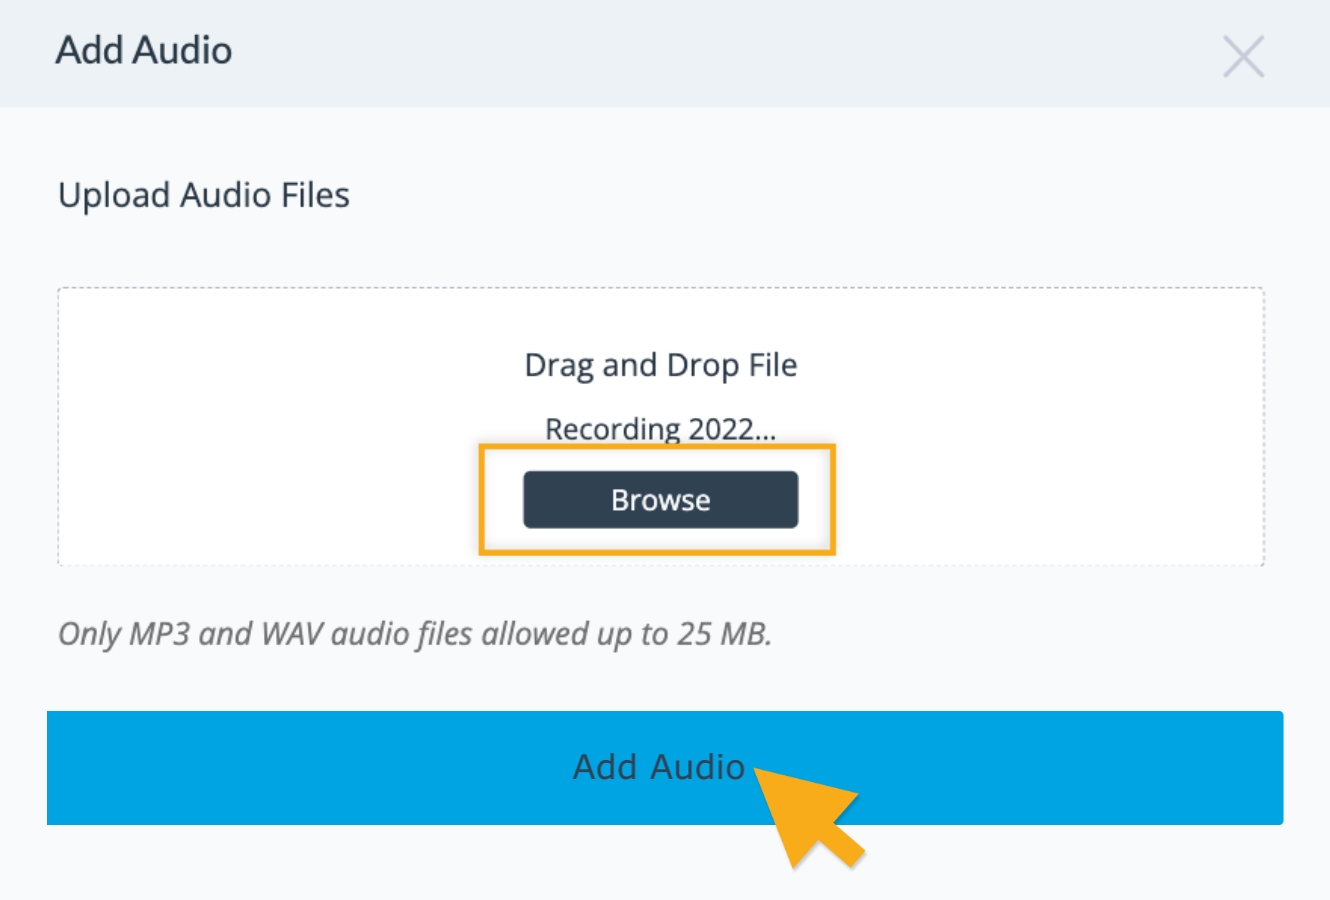
From the Audio Menu, click on the “Upload Audio File” option. A pop-up window will appear from where you need to choose an audio file from your computer. Once that is done, click on the “Add Audio” button.

Note: The “Upload Audio File” is only available for premium users and only MP3 and WAV audio files are allowed up to 25MB.
Add from Visme’s Audio Library
1
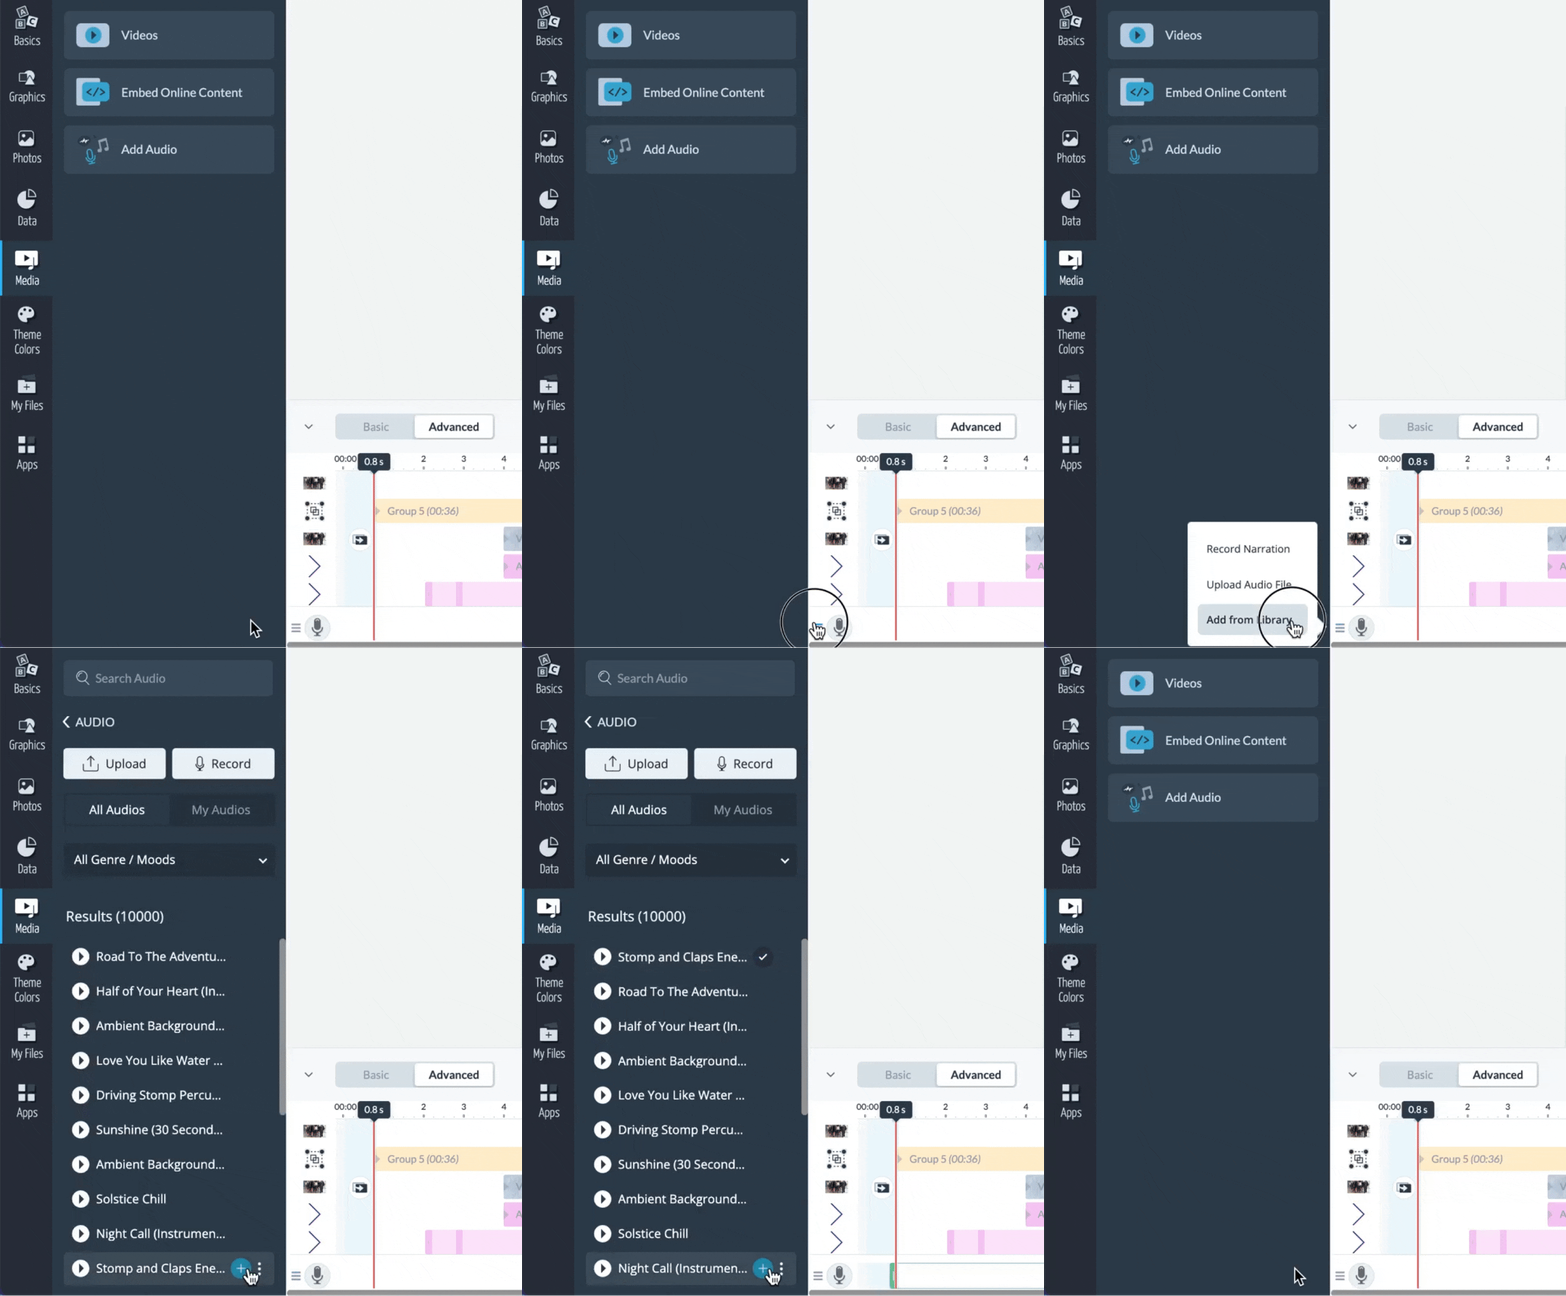
From the Audio Menu, click on the “Add from Library” option. Choose audio from the Audio Library that will appear at the left of your screen.

Note: Learn more on how to use Visme’s Audio Library here.
Record Narration
1
From the Audio Menu, click on the “Record Narration” option. A countdown will begin from 3 before recording, and you can start speaking your narration once you see the red stop button and the audio display capturing your narration through the timeline (from left to right). When you are done recording, click the “stop” button. Click “Ok” to move forward.

Note: For your recording to be successfully added, you have to click Allow for the microphone to be accessed by the application.
Note: If you’d like to record a different narration or use a different audio file click on the “Cancel” button.
Note: Once completed, your recording will be saved in My Files for future use, which you can access conveniently from the left sidebar under Media > Add Audio > My Audios. You can locate your recordings and click the ellipses on the audio to rename the file or download it to your local device.
2
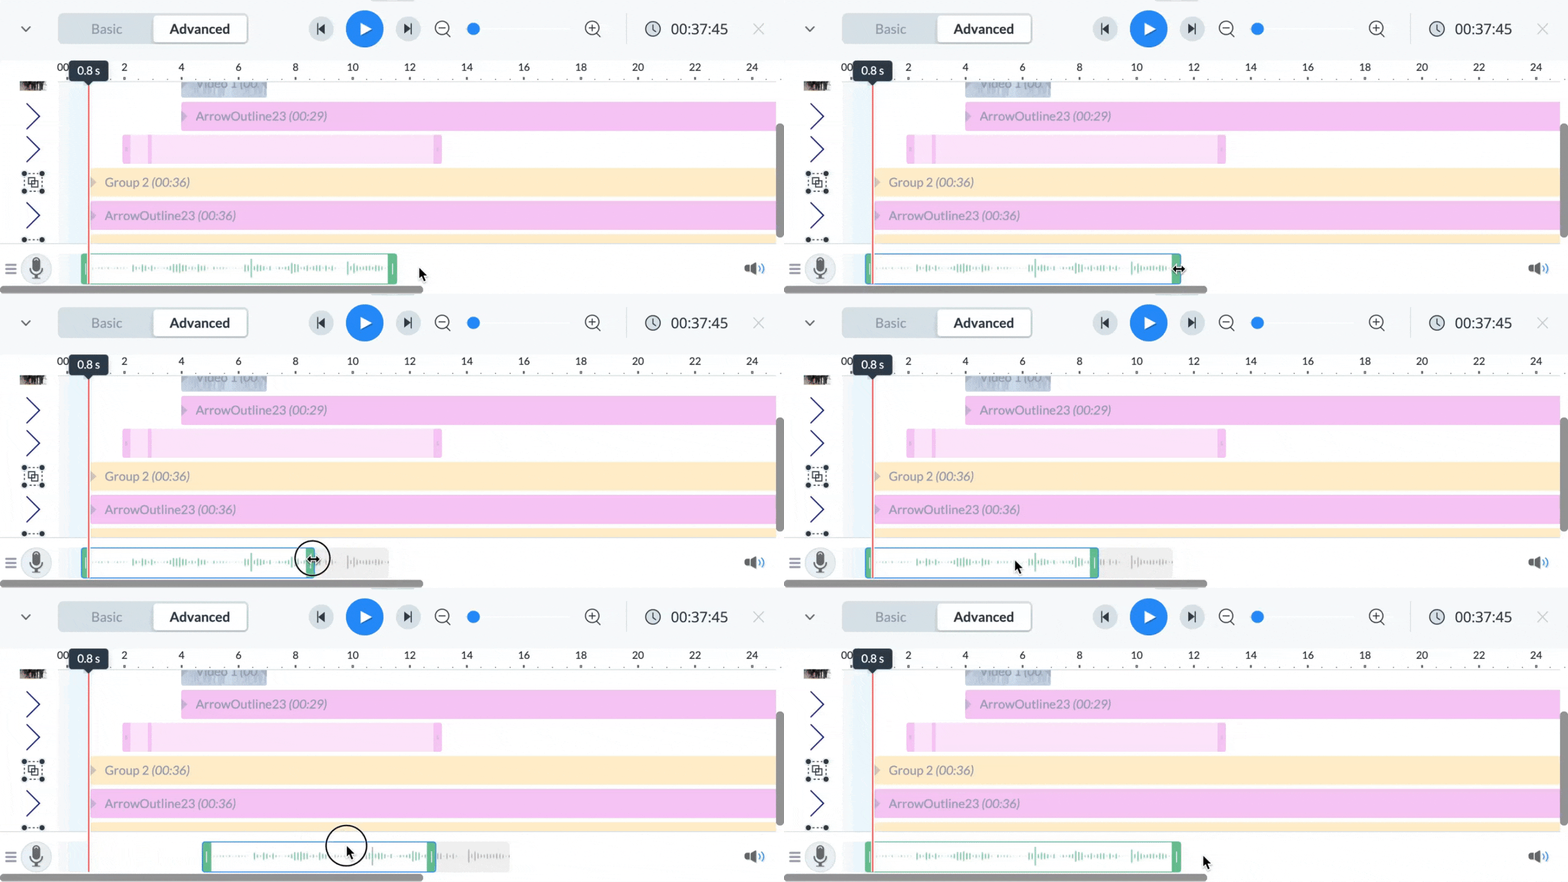
The recording will now appear green in the timeline. You can click the sliders on the left and right side of the audio to trim the recording down, or click within the center of the recording in the timeline to drag and move it to a different point within the slide duration

Note: Learn more on how to use the Basic Tab and the Preview Options of the Animation Timeline here.
Note: Learn more on how to use the Advanced Tab of the Animation Timeline here.
