How can we help you?

Popular Topics : The Basics, Tips & Tricks , and Designing & Editing

Menu +

Animation Timeline: Advanced Tab Overview

The Animation Timeline allows you to precisely customize the animations of your project regarding slide transitions, animation durations, audio and narration, and the order of animated objects based on the timestamps of your timeline, as well as with the arrangement of your objects. Here’s how to use the Advanced Tab of the Animation Timeline:
How to access

1
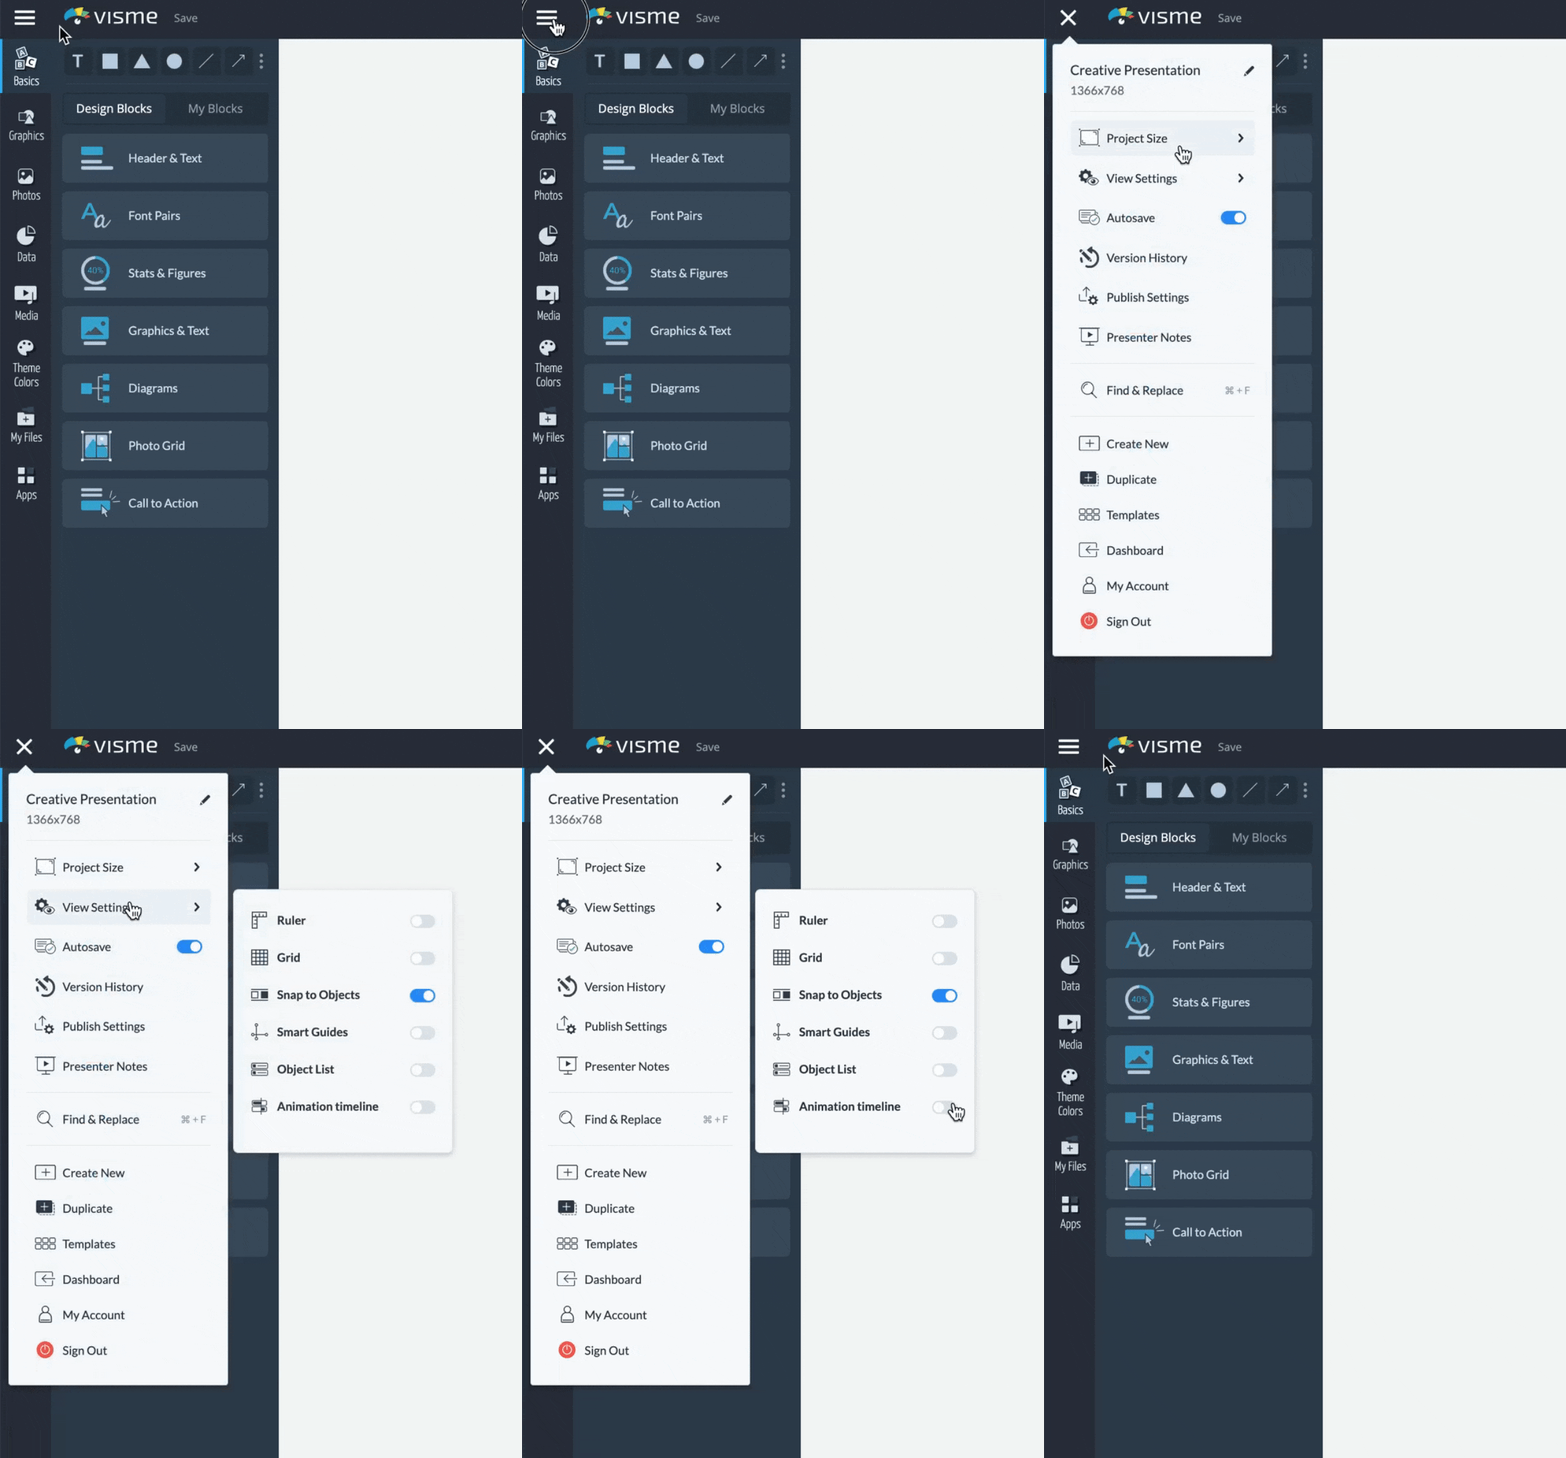
From the editor window of your project, navigate to the top left menu above the sidebar and select “View Settings”. Then, turn the “Animation Timeline” switch on from the dropdown menu.

Or…

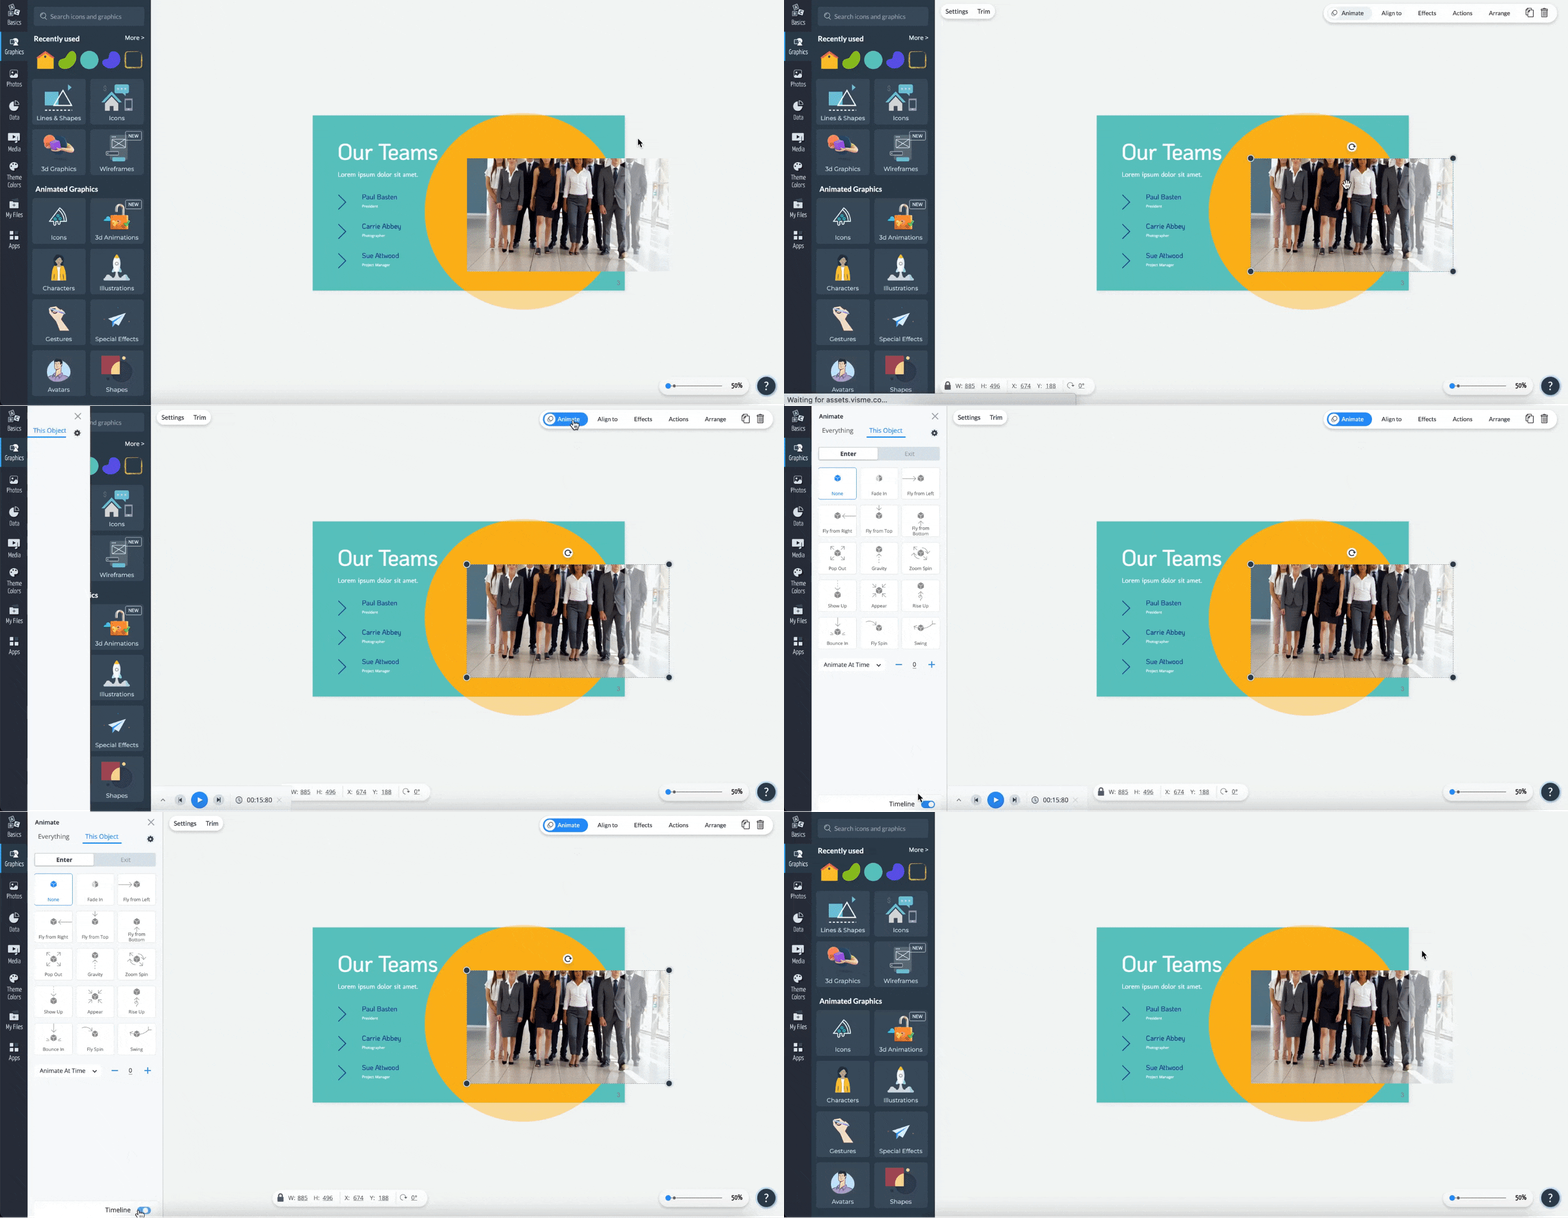
Select an object in your Project and click on the “Actions” button at the top right corner and then select “Animate” from the dropdown menu. The animation menu will appear along the bottom left corner of the Editor. From there, you will be able to turn ON/OFF the “Timeline” switch at the bottom of the animation panel to show or hide the Timeline.
Advanced Tab Overview:

The advanced tab allows you to explore how to customize the order and duration of all of your individually animated objects. Here’s how:

1
Each animated object will be listed based on the arrangement of your objects (from front to back) within the timeline viewer. Hovering over each object will show you a brief description of the type and content of the object. Click on an individual object to select it.

2
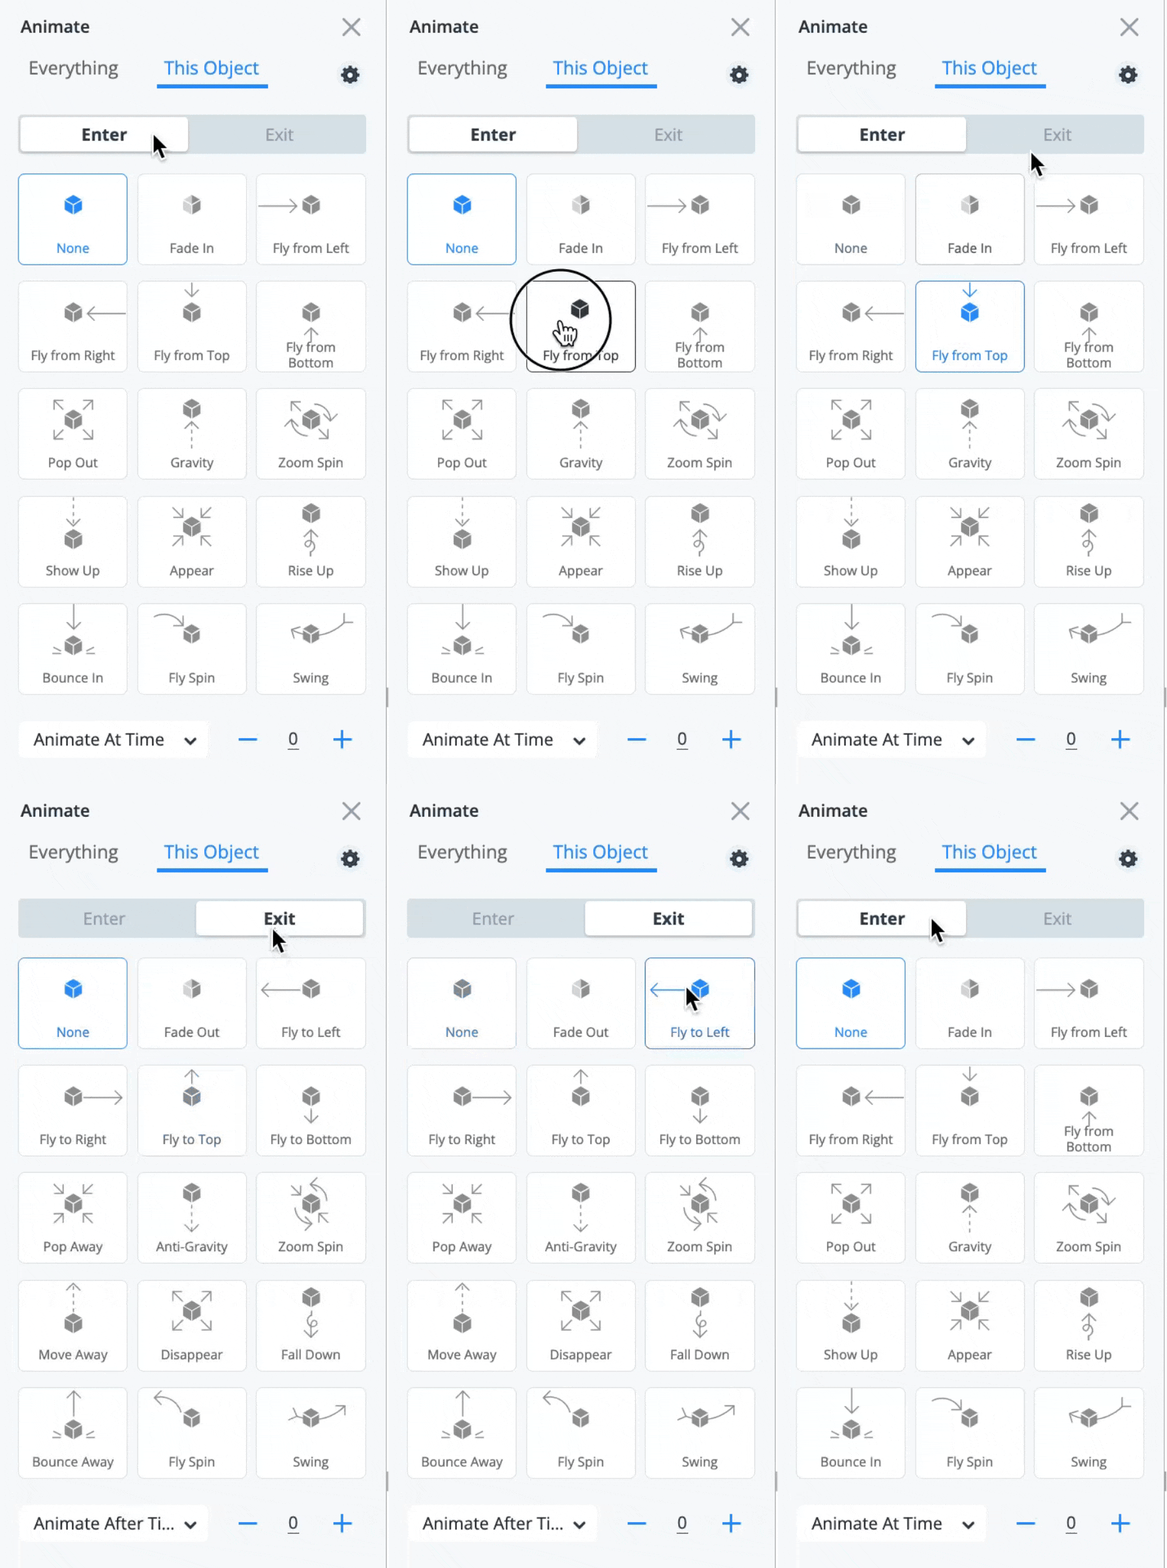
Selecting individual objects in the timeline will open the Animation Window, where you can change the Enter and Exit animations for your object.
3
Click objects within the timeline and drag them to move individual objects forward and backward in the timeline. You can lengthen or shorten their duration by using the handles on the lateral sides of the selected object. If you have your animations based on time, you can also manually type in the timestamps of your enter and exit animations within the left-side animation panel.

4
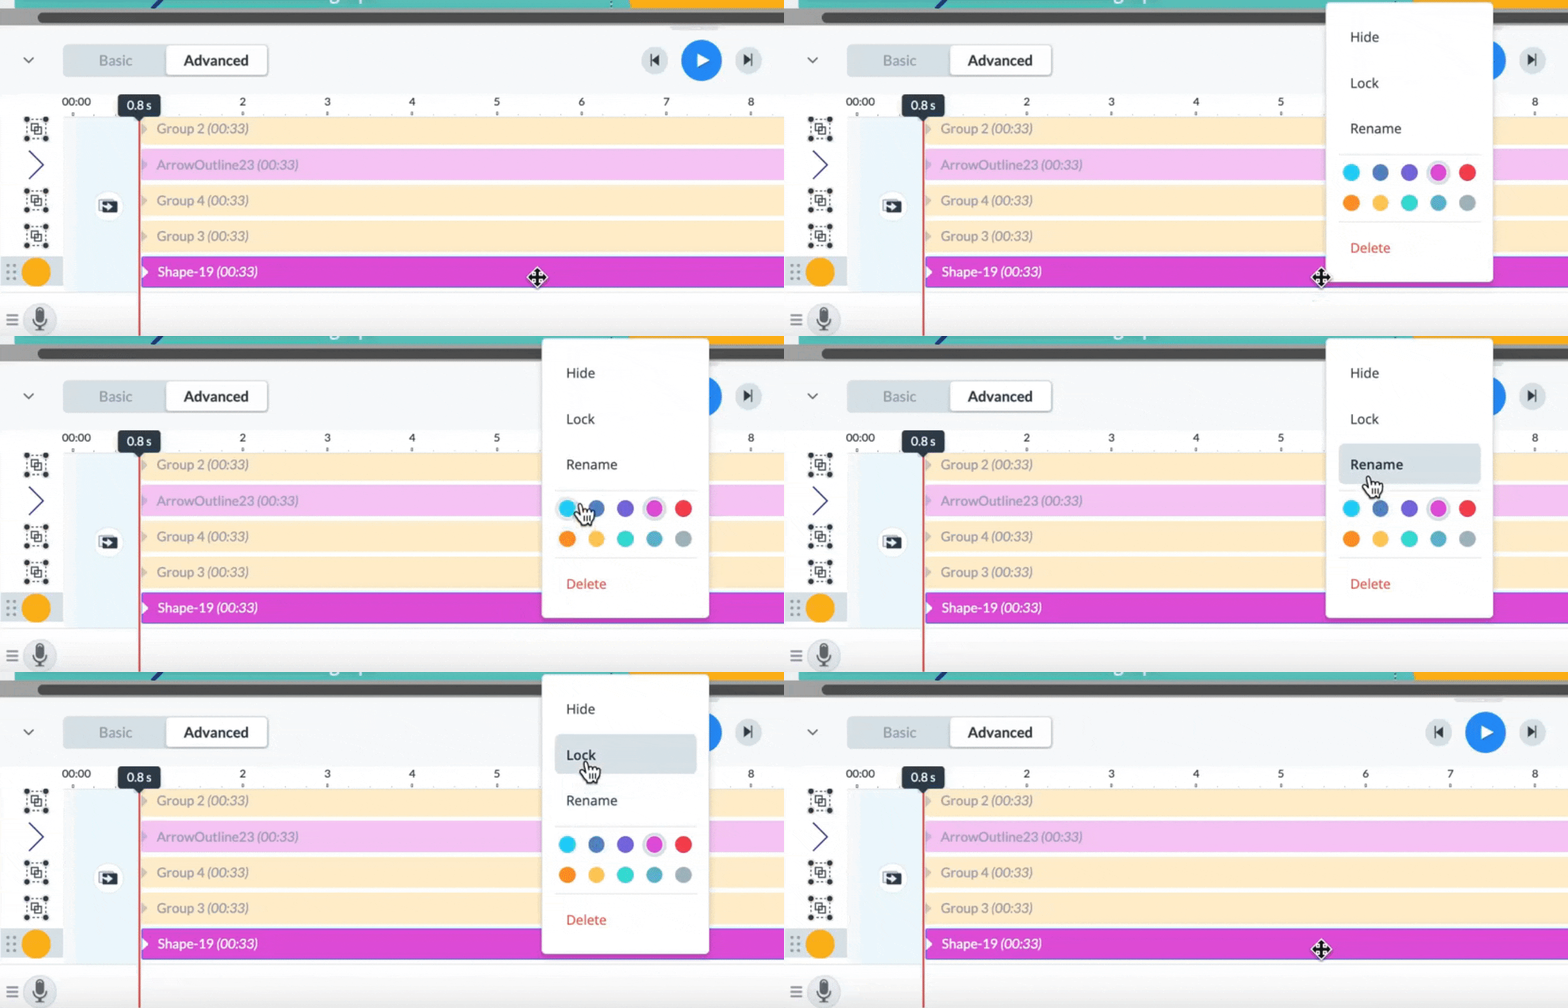
As you click on each object, you can right-click and open a menu to select the option to hide, lock or rename it.

5
After reordering and moving your animated objects into place, click Play to preview your final changes.

Note: If you have a video within your slide, you have several options for how the video will be displayed in your project. Also, you will be able to easily trim, split or animate the video. Learn more here. 

Note: Learn more on how to use the Basic Tab and the Preview Options of the Animation Timeline here. 

Note: Learn more about Audio & Recording Settings here.


Back to home
Home
Animations
  • The Basics
  • Enterprise Plans
  • Getting Started
  • Publish & Present
  • Account & Plans
  • Embed & Download
  • Creating & Editing 101
  • For Print
  • Common Questions & Answers
  • Project Types
  • Presentations
  • Social Graphics
  • Documents
  • Infographics
  • Charts & Graphs
  • Whiteboards
  • Videos / GIFs
  • Printables
  • Custom Size
  • Designing & Editing
  • Designing with AI
  • Data Visualizations
  • Text & Text blocks
  • Interactivity
  • Images
  • Animations
  • Video
  • Tables
  • Audio and Music
  • Graphics, shapes and icons
  • Backgrounds
  • 3D Animated Characters
  • Collaboration and Team Features
  • Workflows
  • My Brand
  • Team & Workspaces
  • Apps and Integrations
  • Analytic Tools & Insights
  • Analytics
  • Tips & Tricks
  • Account & Projects Settings
  • Viewing and Presenting
  • Creating and Designing
  • Productivity Tools
  • Tools & Features
  • My Files
  • Grides & Guides
  • Slide Library & Content Blocks
  • Forms & Surveys
  • Getting Started with Visme Forms
  • Sharing and Embedding your Visme Form
  • Design your Form
  • Data Collection and Management
Visme 101
Visme 101

Learn how Visme will change the way you create stunning content.

Reserve your seat
  • Live Q&A
  • New Features
  • Cool Tips