Learn how Visme will change the way you create stunning content.
Reserve your seat
While using Visme, you can easily track down all your files and fully manage your images and media assets using My Files. This feature gives complete control over uploading, managing, editing and organizing your assets and allows the user to organize your assets into labels and/or folders. Here’s how:
Creating and Managing Folders
1
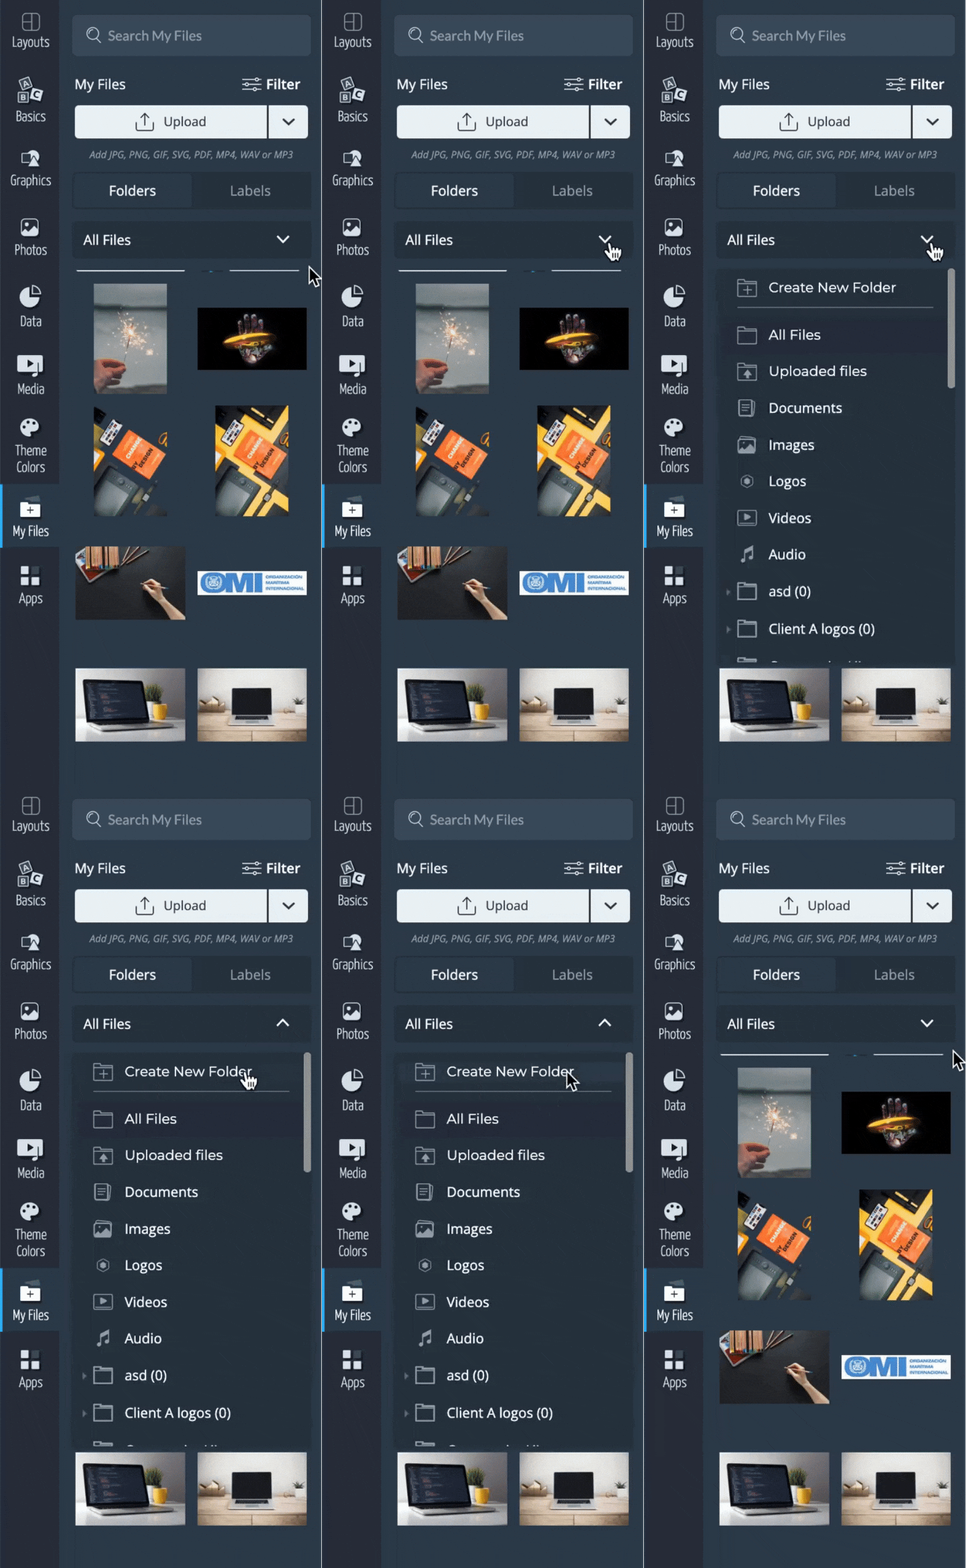
Once you have accessed “My Files”, you will see a dropdown menu that groups your files by type (All items, Recently Used, Documents, Images, Logos, Videos and Audio). At the top of the dropdown menu, you will see a “Create New Folder” button. Click on it to move forward.
2
Name the folder based on your own naming convention and click on the “Create” button once you are done.
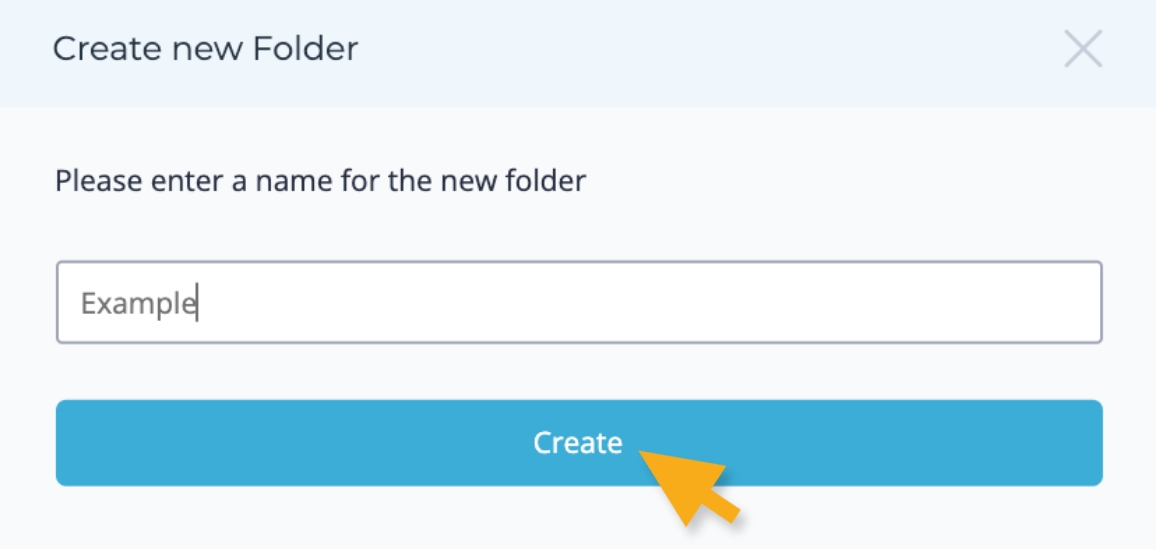
Note: By default, the folder doesn’t contain any assets. You can add files in the newly created folder by selecting the folder itself and clicking on the “Upload” button or simply drag-and-drop files to the desired folder. A single asset can be organized in one folder.
By default, folders in the “My Files” section are displayed in alphabetical order
Creating and Managing Labels
1
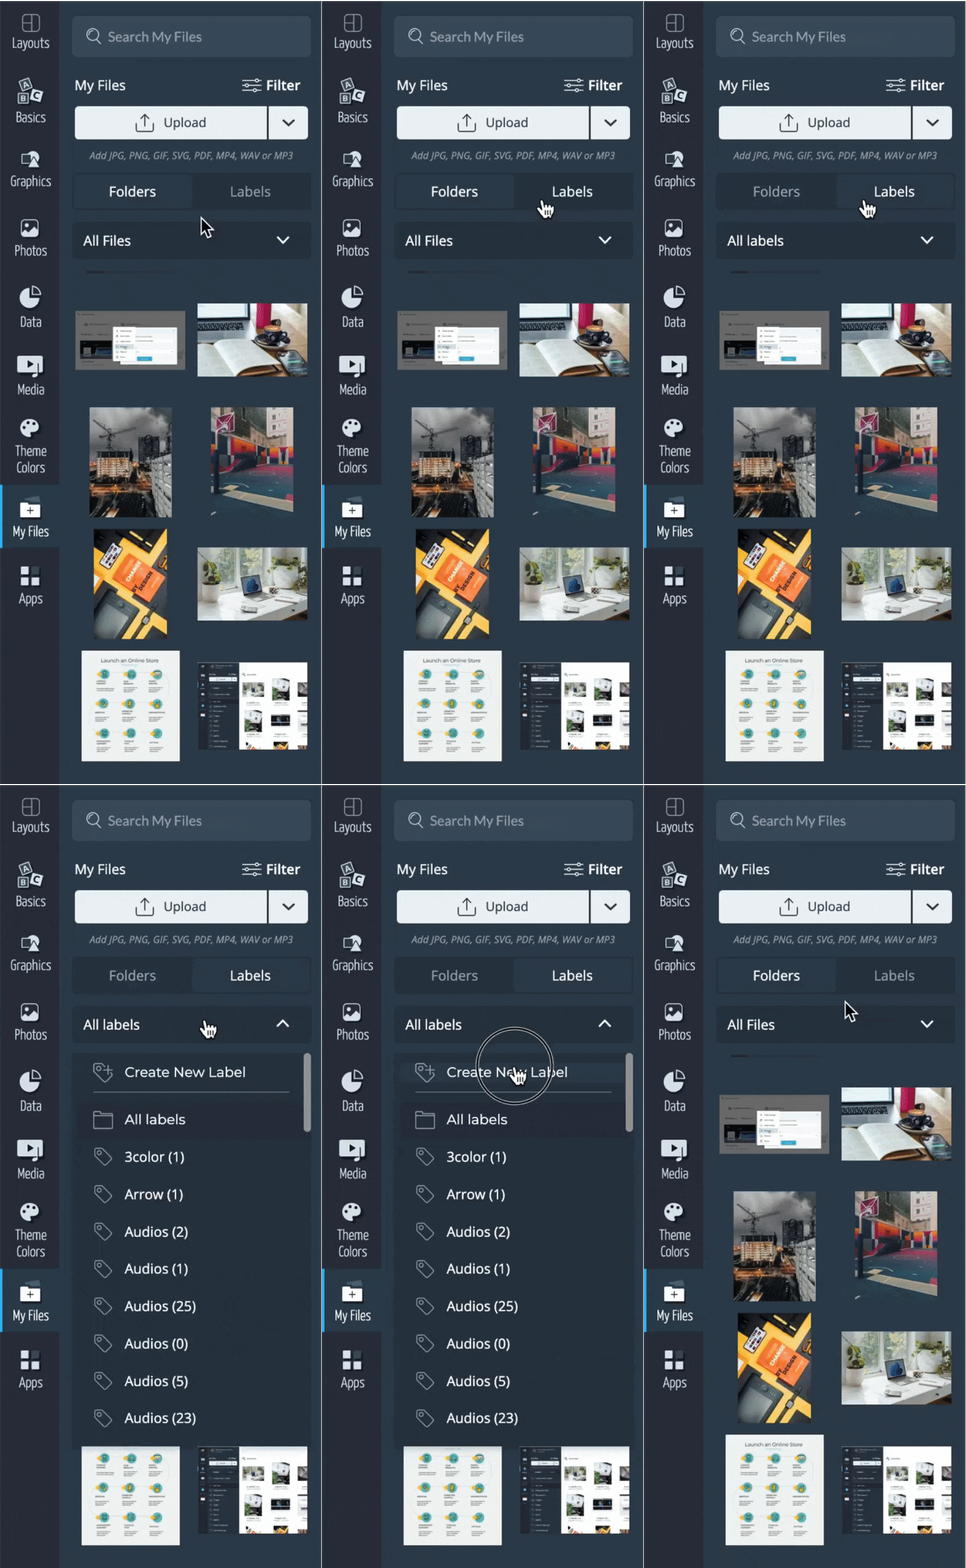
Once you have accessed “My Files”, click on the “Labels” button located beside the “Folders” button. Then, click on the Dropdown Menu and select “Create New Label”.
2
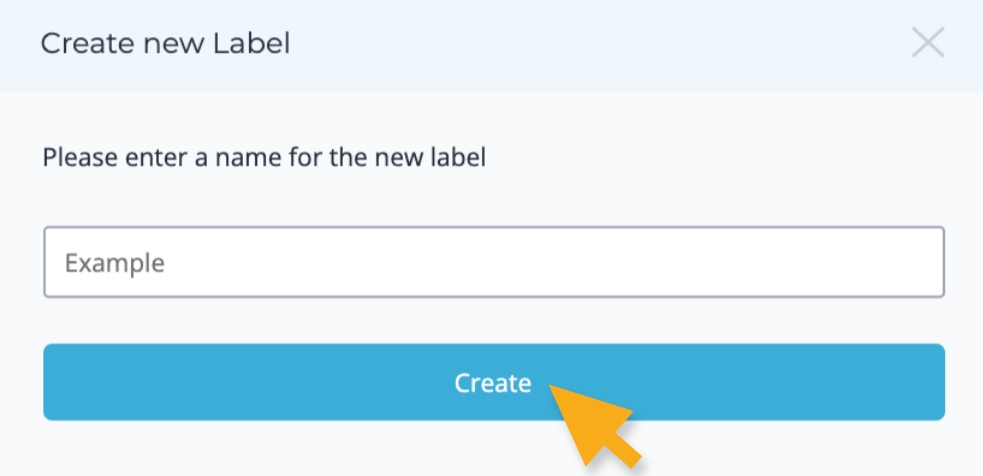
Name the label based on your own naming convention and click on the “Create” button once you are done. Your new label will be added on the left panel.
3
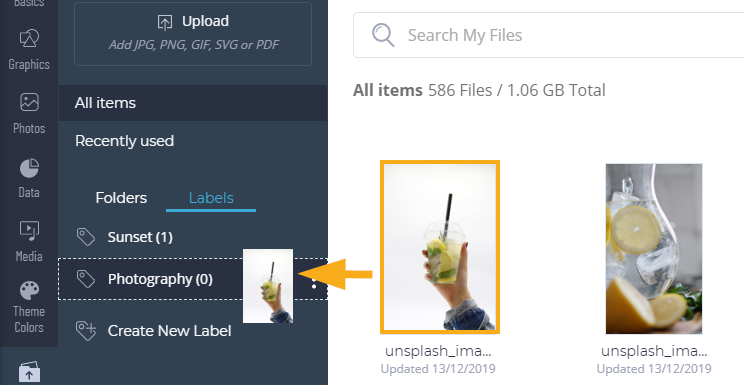
There are two ways to assign labels to a file. one by simply clicking and dragging the file into the label folder.
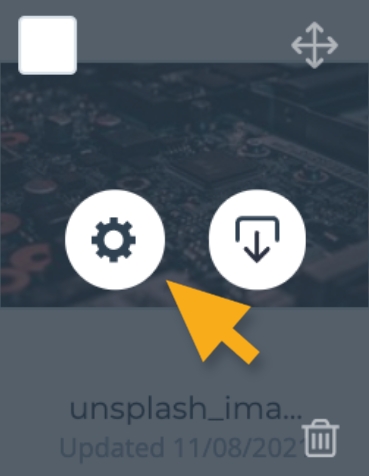
Or, by accessing the file settings, navigate to the “manage Labels” tab and type the Label you want the file to belong to. Click on the “Close” button once you are done.
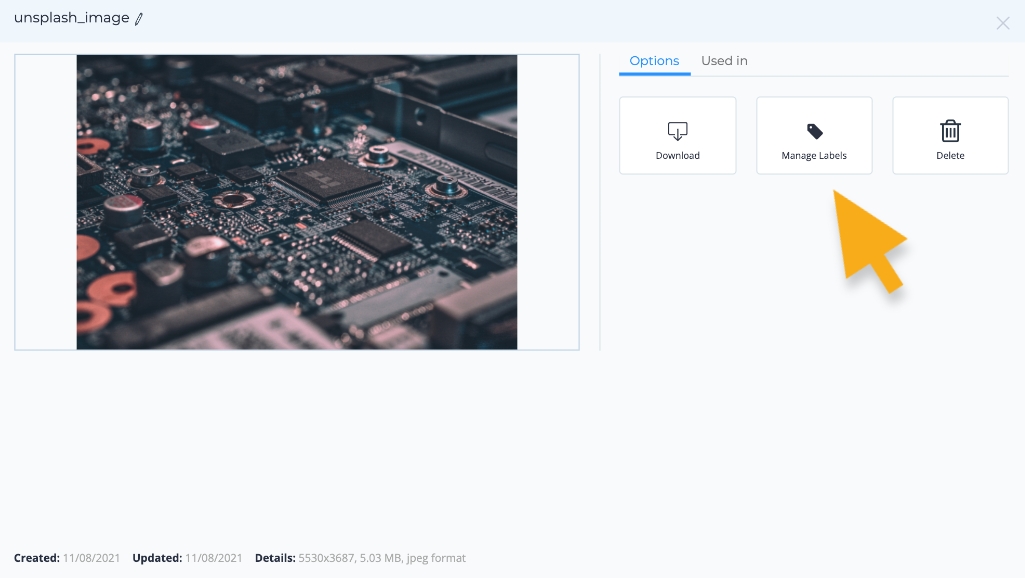
Note: An asset can have up to 10 labels. Labels are searchable within the My Files window by using the keyword/label in the search bar at the top of the My Files view.
Visme allows you to set permissions to certain folders. Learn more here.
My Files allows the user to organize your assets into labels and/or folders. Learn more here.
Learn more on how to upload files and access the files settings here.
